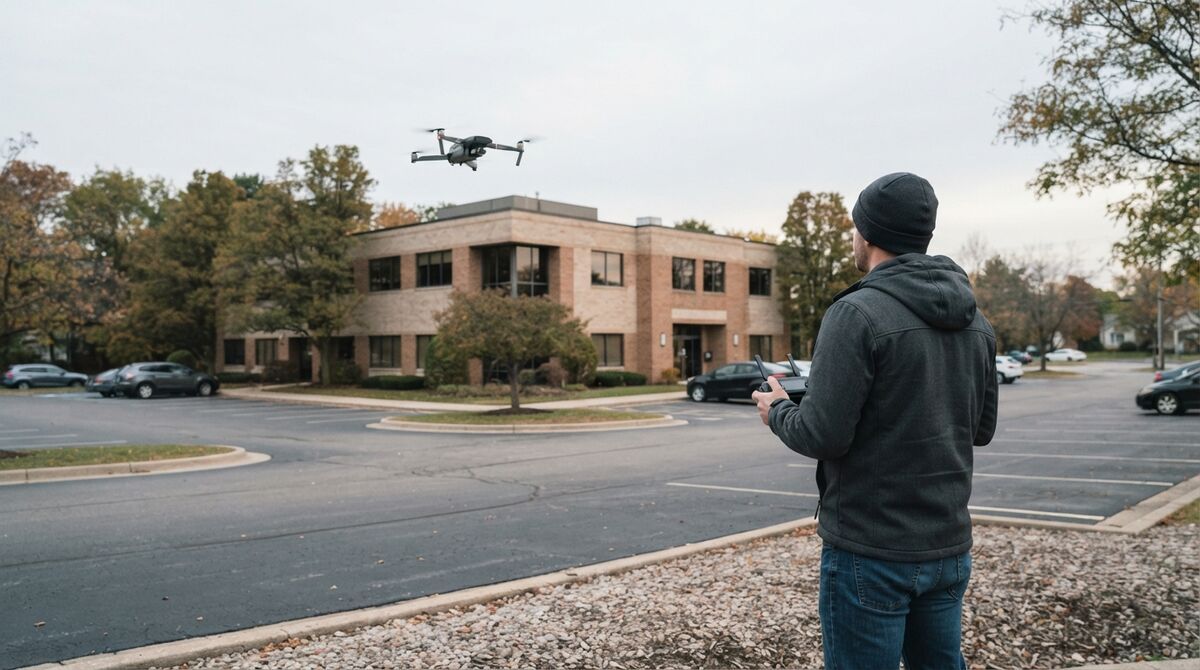
This free, printable drone preflight checklist walks FAA Part 107 pilots through every check that matters before launch: airframe, batteries, controller, Remote ID, airspace, weather, and the hover test. Whether you're flying a construction survey or documenting an accident scene for law enforcement, every flight starts with the same disciplined walk-through. Updated for 2026, this guide covers what to check, in what order, and why each step matters under Part 107.
Key Takeaways
- FAA 14 CFR 107.49 requires remote pilots to verify the aircraft is safe to fly before every flight; skipping it exposes operators to enforcement action, insurance disputes, and personal liability.
- A complete drone preflight checklist covers six categories in order: airframe and propulsion, batteries, controller and Remote ID, camera and payload, airspace and weather, and mission planning.
- Inspect every battery for swelling, check its cycle count, and warm lithium batteries above 68°F (20°C) before flying in cold weather.
- Verify airspace on site immediately before flight, since LAANC authorizations are location and altitude specific and TFRs can appear with short notice.
- The hover test at 5 to 10 ft AGL is the final gate: any drift, abnormal motor sound, or telemetry anomaly means land and diagnose.
Contents
- What Is a Drone Preflight Checklist?
- Does the FAA Require a Preflight Checklist?
- What Should Be on a Drone Preflight Checklist?
- How Do You Inspect the Airframe Before Flight?
- What Battery Checks Should You Perform?
- How Do You Verify Airspace and Weather?
- What Should You Check During the Post-Startup Hover Test?
- What Else Should You Check When Flying for a 3D Model?
- FAQ
What Is a Drone Preflight Checklist?
A drone preflight checklist is a systematic, ordered inspection of the aircraft, controller, payload, environment, and airspace completed before every flight to verify airworthiness and regulatory compliance. It covers everything from propeller condition and battery charge to Remote ID, LAANC authorization, and weather minimums, and FAA Part 107 requires this kind of check before each operation.
The term "pre flight checklist drone" refers to this same structured process. It applies to recreational pilots flying under the FAA's recreational rules and to commercial remote pilots certificated under Part 107. A complete drone flight checklist spans three phases: pre-flight (on the ground before launch), in-flight (monitoring during the mission), and post-flight (shutdown and equipment review). Most incidents happen because pilots skip or rush the pre-flight phase.
For operators who fly regularly, such as construction teams, public safety agencies, and survey firms, a printed or app-based checklist removes the reliance on memory and creates a consistent compliance record. SkyeBrowse's drone mapping guide outlines how systematic pre-flight preparation directly improves data quality on mapping missions.
Does the FAA Require a Preflight Checklist?
Yes. FAA 14 CFR Part 107.49 requires the remote pilot in command to assess the operating environment and confirm the small unmanned aircraft is in a condition for safe flight before each operation. The FAA doesn't prescribe a checklist format, and the legal obligation to verify airworthiness falls entirely on the pilot. Failure to comply exposes the operator to certificate action, civil penalties, and liability exposure.
FAA 14 CFR Part 107.49 is the controlling regulation. It requires the remote pilot in command to (1) assess the operating environment, including local weather conditions, local airspace, and the location of persons and property on the surface; and (2) ensure the small unmanned aircraft system is in a condition for safe operation. The FAA doesn't prescribe a mandatory checklist, so pilots are responsible for building one rigorous enough to cover every foreseeable risk.
Two newer requirements belong on every 2026 checklist. The FAA Remote ID rule requires registered drones to broadcast identification and location, through built-in Standard Remote ID or an add-on broadcast module, and the FAA has enforced it since March 2024. Part 107 pilots also need current recurrent training, completed within the previous 24 calendar months. Documenting your checklist completion creates a compliance record that protects you in a post-incident investigation or insurance audit.
Operators pursuing Part 107 certification can review the full regulatory framework in our Part 107 drone certification guide.
What Should Be on a Drone Preflight Checklist?
A comprehensive drone preflight checklist covers six categories: airframe and propulsion, batteries, remote controller and Remote ID, camera and payload, airspace and weather, and mission planning. Check each category in order before every flight. A free, printable version of the full list is below.
The six-category structure below is model-agnostic and applies to DJI, Autel, Skydio, and other platforms. Customize the line items for your aircraft and keep every category. Print this section or copy it into your notes app for use in the field.
Complete Preflight Checklist (Printable)
1. Airframe and Propulsion
☐ Inspect airframe for cracks, dents, or loose components
☐ Check all propellers for chips, cracks, or deformation; replace if any damage is found
☐ Verify propellers are correctly installed (CW/CCW markings match motor positions)
☐ Confirm propellers are fully locked and seated
☐ Check motor mounts for looseness
☐ Spin each motor by hand to check for grinding or resistance
☐ Inspect landing gear for damage or misalignment
☐ Verify all screws and fasteners are tight
☐ Check gimbal for free movement and clamp removal
☐ Confirm the FAA registration number is visible on the aircraft exterior
2. Batteries
☐ Check flight battery charge level (minimum 95% for full missions)
☐ Inspect battery for swelling, dents, or heat damage
☐ Verify battery cycle count is within manufacturer limits
☐ Confirm battery is properly seated and locked
☐ Check controller battery charge level
☐ Verify mobile device or display battery charge level
☐ Bring at least one spare flight battery for critical missions
3. Remote Controller, Data Link, and Remote ID
☐ Power on controller and verify firmware is current
☐ Confirm control sticks respond correctly in all axes
☐ Verify video feed is transmitting before launch
☐ Check control link signal strength
☐ Confirm Remote ID is broadcasting (built-in or broadcast module powered on)
☐ Confirm return-to-home (RTH) altitude clears site obstacles
☐ Set failsafe behavior (RTH vs hover vs land)
☐ Verify SD card is installed in controller if applicable
4. Camera and Payload
☐ Clean camera lens of dust, fingerprints, and moisture
☐ Verify camera settings: resolution, frame rate, white balance, exposure
☐ Confirm SD card is installed, formatted, and has enough capacity
☐ Check gimbal calibration and stabilization
☐ If using filters (ND, polarizer), verify the correct filter is mounted
☐ For mapping missions: set image overlap parameters in the flight planning app
☐ For video capture: confirm recording format (MP4/MOV), resolution, and GPS subtitle recording
5. Airspace and Weather
☐ Check LAANC authorization status if operating in controlled airspace
☐ Check NOTAMs for the operating area (use FAA B4UFLY or equivalent)
☐ Confirm no TFRs (Temporary Flight Restrictions) are active
☐ Check wind speed and gusts; abort if they exceed your drone's rated limit
☐ Check visibility: Part 107 requires 3 statute miles minimum
☐ Verify cloud clearance: at least 500 ft below and 2,000 ft horizontally from clouds
☐ Check the precipitation forecast; avoid rain, snow, and fog
☐ Note sun position for glare and shadow effects on imagery
☐ Night or twilight flight: anti-collision lighting on and visible for 3 statute miles
6. Mission Planning
☐ Define flight area boundaries and altitude
☐ Set waypoints or flight path in the planning app
☐ Identify obstacles in the flight zone (trees, power lines, structures, antennas)
☐ Establish visual observer positions if required
☐ Brief all personnel on the flight plan, landing zone, and emergency procedures
☐ Confirm permission from the property owner or controlling authority
☐ Set geofence limits if supported by the aircraft
☐ Confirm your Part 107 certificate and recurrent training are current
How Do You Inspect the Airframe Before Flight?
Airframe inspection verifies the physical integrity of every structural and moving component on the aircraft. Work from the top of the drone downward and outward: propellers first, then motors, then the body and arms, then landing gear and gimbal. Any crack, looseness, or abnormal resistance is a no-fly condition.
Begin with the propellers. Hold each blade at the tip and flex it gently; a healthy propeller resists with uniform stiffness. Any visible nick, chip, or crack means immediate replacement. Hairline fractures that are invisible on the ground can propagate under centrifugal force and cause a blade to separate mid-flight. Treat propellers as consumable parts, and use the FAA UAS resource center for current maintenance and safety guidance.
Next, spin each motor slowly by hand. Smooth, free rotation with no grit or grinding indicates good bearings. Resistance or rough spots suggest bearing wear that will worsen under load. Check motor mounts for any looseness, since a motor that separates in flight is an unrecoverable failure.
Examine the airframe body for stress cracks, especially around motor arms and the battery bay. If the drone has folding arms, extend each arm fully and verify it locks positively. For the gimbal, remove the clamp or cover, power it on, and confirm it moves freely through its full range without stuttering or vibration.
What Battery Checks Should You Perform?
Battery inspection covers four factors: charge state, physical condition, thermal status, and cycle life. A weak or damaged battery is one of the fastest ways to lose a flight, and most battery problems are visible on the ground. Inspect for swelling, verify charge is above 95% for full missions, and warm cold batteries before launch.
Check the charge level first. Most mapping missions need a full charge (95% or more) to leave adequate flight time plus reserve. For critical operations like evidence capture at accident scenes, always carry at least one spare battery, because a dead battery during a time-sensitive capture means the window is gone.
Inspect the battery housing for swelling, which signals internal cell degradation and a potential fire risk. Retire a swollen battery immediately and never fly with it. Look for dents, punctures, or discoloration that could indicate impact damage or thermal stress.
Verify the battery cycle count through the manufacturer's app. Most lithium-polymer drone batteries are rated for 200 to 500 charge cycles before capacity loss becomes significant. Batteries nearing their rated limit should be tested with a full discharge-charge cycle to confirm remaining capacity.
Temperature matters. Lithium batteries perform poorly below 50°F (10°C). In cold weather, warm batteries to at least 68°F (20°C) before flight using the drone's built-in preheating or by keeping batteries insulated until launch.
How Do You Verify Airspace and Weather?
Airspace and weather verification confirms legal compliance and safe operating conditions. Do it on site, immediately before flight, even if you reviewed conditions earlier in the day. Use the FAA B4UFLY app or an equivalent LAANC-integrated tool to confirm authorization, check NOTAMs, and verify Part 107 weather minimums.
Use the FAA B4UFLY app or an FAA-approved LAANC provider such as Aloft to verify your operating location. If you're in controlled airspace (Class B, C, D, or E surface area), you'll need LAANC authorization at your planned altitude before launch. LAANC authorizations are location specific and altitude specific, so an authorization for one grid square doesn't cover the next one.
Check NOTAMs (Notices to Air Missions) for your operating area. TFRs can appear with short notice for VIP movement, wildfire suppression, or emergency operations. Flying in a TFR is a federal violation that can lead to certificate action and criminal penalties.
For weather, the Part 107 minimums are 3 statute miles visibility and 500 feet below / 2,000 feet horizontally from clouds. In practice, wind is the more common mission-stopper. Most consumer and prosumer drones are rated for sustained winds of roughly 20 to 27 mph depending on the model. Gusts beyond your drone's rating create real risk of losing control and also degrade image quality through motion blur and inconsistent overlap, a significant concern for aerial photogrammetry work where data precision is critical.
Teams flying mapping missions at scale can find more on planning and flight execution in SkyeBrowse's guide to free drone mapping software, and our broader drone mapping software guide covers choosing a processing platform.
What Should You Check During the Post-Startup Hover Test?
The hover test is the final verification gate between powering on and executing the mission. After GPS lock (minimum 10 satellites), take off to 5 to 10 ft AGL and hold position for 15 to 30 seconds. Any drift, abnormal motor sound, telemetry anomaly, or unstable video feed is an abort condition, because a problem that's minor at 10 feet becomes dangerous at 300 feet.
After powering on the drone and verifying GPS lock, perform a controlled takeoff to 5 to 10 feet AGL and hold a stable hover for 15 to 30 seconds.
During the hover, verify:
- Position hold: The drone should hold position within 1 to 2 feet without pilot input. If it's drifting, suspect compass interference, GPS issues, or wind beyond safe limits.
- Control response: Input small corrections in all four axes (pitch, roll, yaw, throttle) and confirm smooth, proportional response.
- Motor sounds: Listen for irregular vibration, grinding, or pulsing that wasn't present during hand checks.
- Video feed: Confirm the live camera feed is stable, in focus, and correctly exposed.
- Telemetry: Verify battery voltage, GPS satellite count, and signal strength are all within normal ranges on the controller display.
If anything looks or sounds wrong during the hover test, land immediately and don't relaunch until you've diagnosed it.
What Else Should You Check When Flying for a 3D Model?
A 3D model capture needs a second, capture-focused list on top of the safety preflight. Record in 4K, turn on GPS video subtitles so the drone saves an .SRT or .ASS file, lock the zoom, and plan orbits that change altitude or gimbal angle. Those settings have the biggest effect on model quality.
Once the aircraft passes this preflight, pilots capturing buildings or scenes for 3D reconstruction should run our drone 3D model flight checklist. It covers DJI and Autel subtitle settings, a two-orbit plan for standard buildings, a grid-plus-orbits plan for large sites, and the mistakes that ruin models. For the full end-to-end workflow, see how to make a 3D model with a drone.
SkyeBrowse turns that drone video into a measurable 3D model in the cloud at app.skyebrowse.com, with most models ready in 5 to 10 minutes after upload.
FAQ
What is a drone preflight checklist?
A drone preflight checklist is a structured, step-by-step inspection completed before every flight to verify that the aircraft, controller, payload, airspace, and mission parameters are ready for safe and legal operation. Under FAA Part 107, completing this inspection before each flight is a regulatory requirement.
Is a preflight checklist legally required for Part 107 operations?
Yes. FAA 14 CFR 107.49 requires the remote pilot in command to ensure the drone is in a condition for safe flight before each operation. The FAA doesn't mandate a specific checklist format, and documenting your preflight process creates a compliance record that protects you after an incident or audit.
How long should a preflight inspection take?
A thorough preflight inspection takes 5 to 10 minutes for experienced pilots. For time-critical operations like accident scene documentation, a practiced, standardized checklist ensures nothing is skipped under pressure. SkyeBrowse operators use the same checklist before both automated Flight App captures and manual video flights.
Do I need a separate checklist for each drone model?
The core categories (airframe, battery, controller, camera, airspace, mission) apply to every drone. Customize the specific items for your model; for example, DJI drones have gimbal clamp removal steps, while Autel drones use different battery locking mechanisms. Keep a master checklist and add model-specific items as supplements.
Does my drone need Remote ID before every flight?
If the drone must be registered with the FAA, it must broadcast Remote ID, either through built-in Standard Remote ID or an add-on broadcast module, unless you fly inside an FAA-Recognized Identification Area. Confirm the broadcast is active as part of your preflight. Details are on the FAA Remote ID page.
What happens if I skip the preflight checklist?
Skipping preflight increases the risk of mid-flight failure, regulatory violations, and invalid data capture. For public safety operations, a missed setting can invalidate evidence collected at a scene that cannot be revisited. For commercial mapping projects, a wasted flight costs battery cycles, schedule time, and client confidence.
Should I log my preflight inspections?
Yes. Maintain a flight log that records the date, time, location, aircraft serial number, battery serial number, pilot name, and a confirmation that preflight was completed. This log is your compliance record for FAA audits and your evidence of due diligence for insurance claims.
Upload your first video free. Create a free SkyeBrowse account, upload a drone video, and get a 3D model processed in the cloud. Freemium organizations that have never had a paid plan can get their first full Commercial model for $5 (normally $24.99), with every Pro tool and export included and 90-day storage.