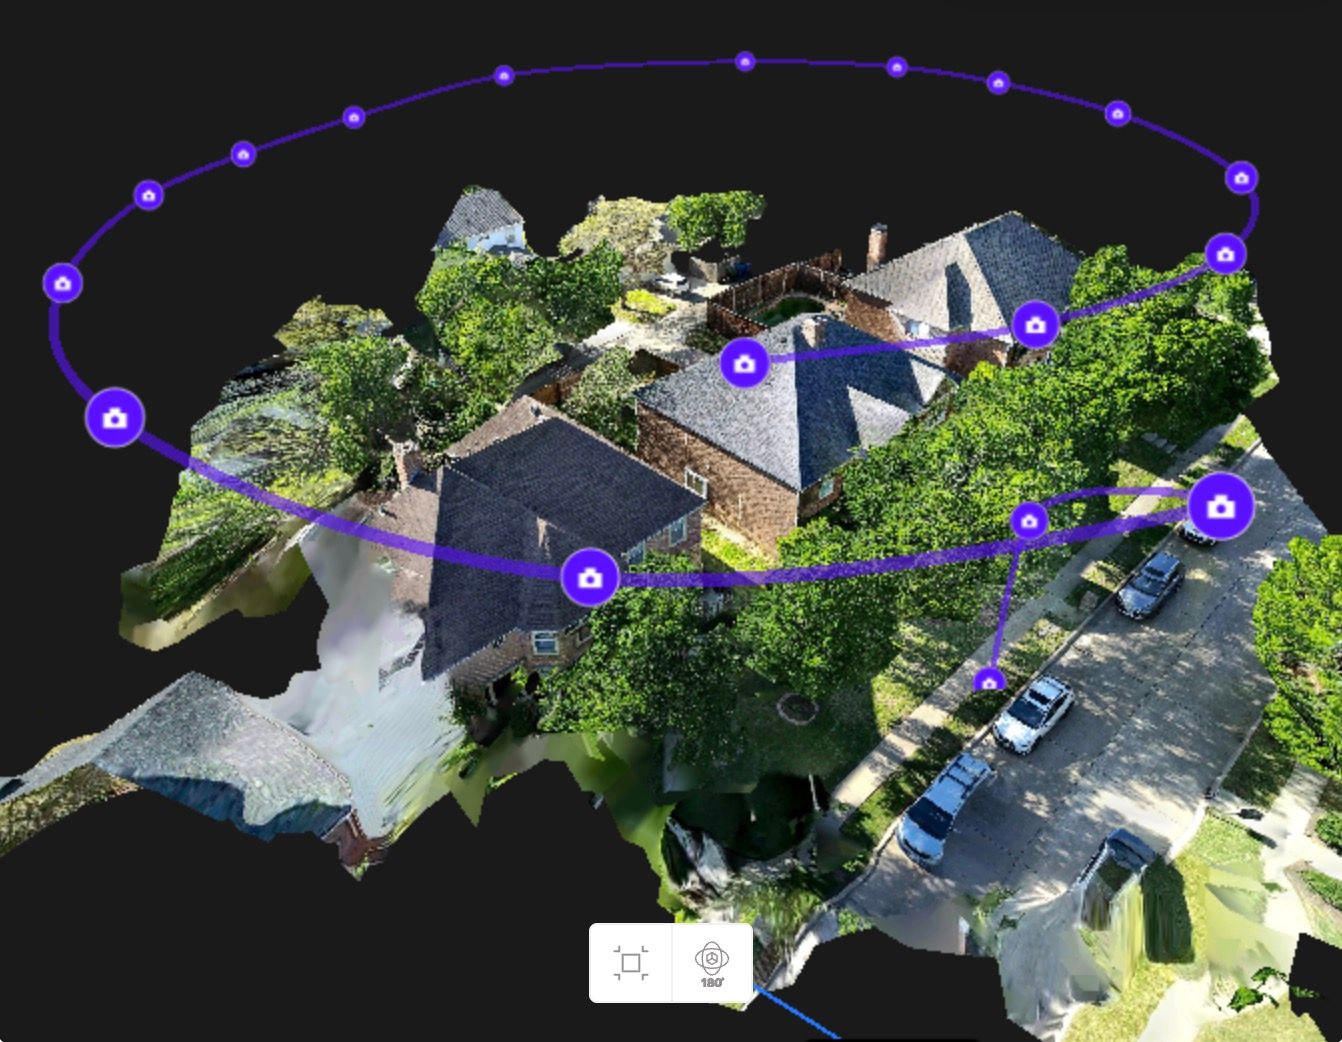
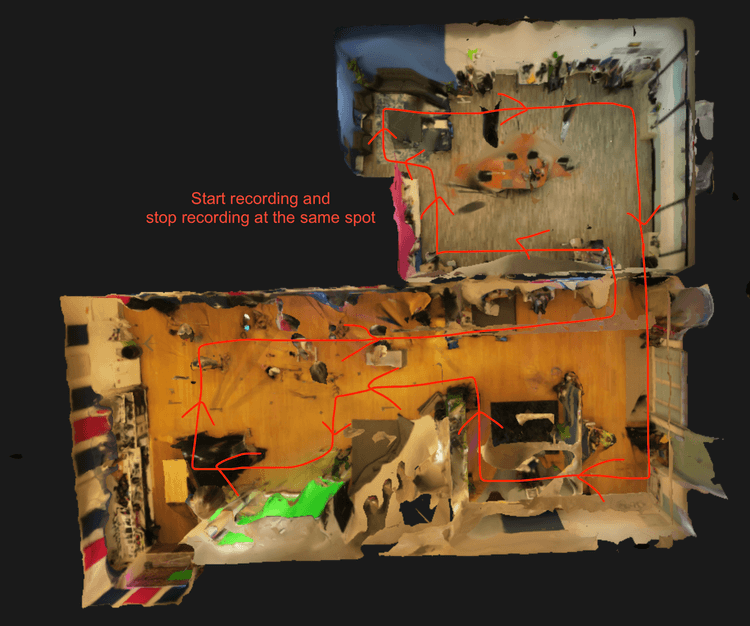
Making the 3D model is only half the workflow. The other half happens inside the SkyeBrowse 3D model viewer, where purpose-built tools turn a drone flight into measurements, line of sight studies, CAD site plans, factual diagrams, and shareable deliverables. This tutorial walks through every tool in the viewer: how to navigate, how each measure and view tool works, and how to export what you build.
What can you do in the SkyeBrowse 3D model viewer? The viewer opens any SkyeBrowse 3D model in a browser and provides measurement tools (distance, area, volume, angle, slope), view tools (point of view, heat map, topographic map, line of sight, sun and shadow study), import tools (image and 3D model overlays), and create tools that export screenshots, sketch drawings, AI floor plans, CAD site plans, flythrough videos, and factual diagram PDFs.
Key Takeaways
Navigation takes three inputs: left click and drag to rotate, right click and drag to pan, and double click to zoom to a point.
Tools are split into Measure and Create tabs. Measure tools analyze the scene (distance, area, volume, line of sight, topo). Create tools export deliverables (screenshots, sketch drawings, floor plans, CAD site plans, videos, factual diagrams).
You never have to hunt for a tool. Press Cmd+K (Mac) or Ctrl+K (Windows), type the tool name, and press enter. Undo and redo sit at the bottom of the viewer.
Everything you create can be shared with a link, embedded on a website, or shared securely with specific people.
Contents
- How Do You Navigate the 3D Viewer?
- What Are the Measurement Tools?
- What Are the View Tools?
- Can You Import Images and Other 3D Models?
- What Can You Create and Export?
- How Do You Share a 3D Model?
- Frequently Asked Questions
How Do You Navigate the 3D Viewer?
Navigation uses three mouse controls: left click and drag to rotate, right click and drag to pan, and double click to zoom into a point. Tools are split into a Measure tab for on-scene analysis and a Create tab for exports. The search bar and the Cmd+K/Ctrl+K power search find any tool by name, and undo/redo buttons at the bottom of the viewer roll back or restore any change.
Open any model by clicking View Model on its card. A loading animation plays, and if you are in a hurry you can click during the animation to jump straight into the model.
Once inside, navigation works with three controls:
- Left click and drag rotates around a point.
- Right click and drag pans across the scene.
- Double click zooms in and centers on the point you clicked, which is the fastest way to focus on a specific corner of a scene.
The left panel splits tools between Measure and Create. Measure tools give you analysis on the scene itself. Create tools generate videos, AI floor plans, CAD site plans, factual diagrams, and other exports.
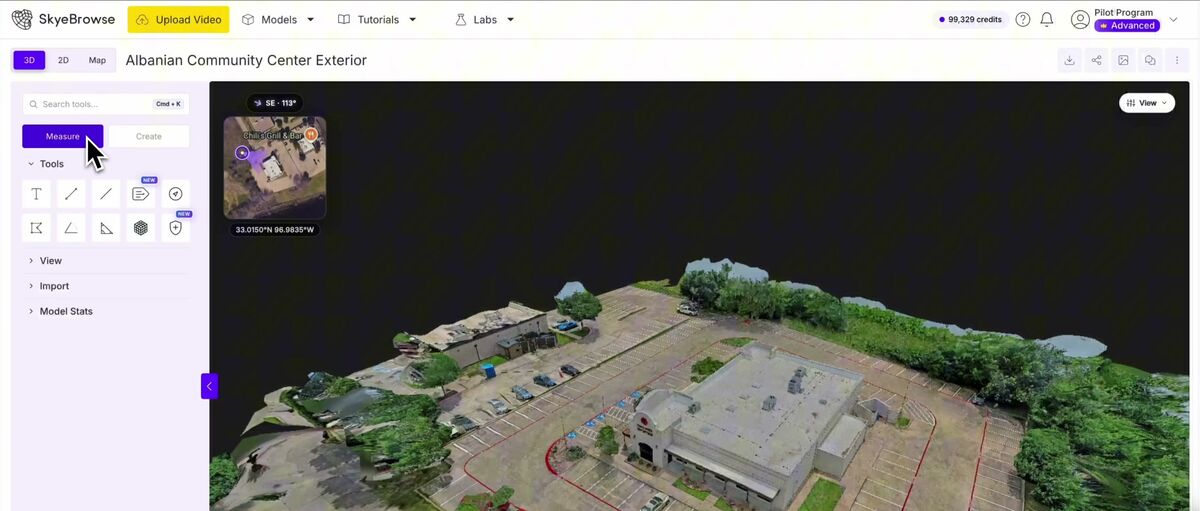
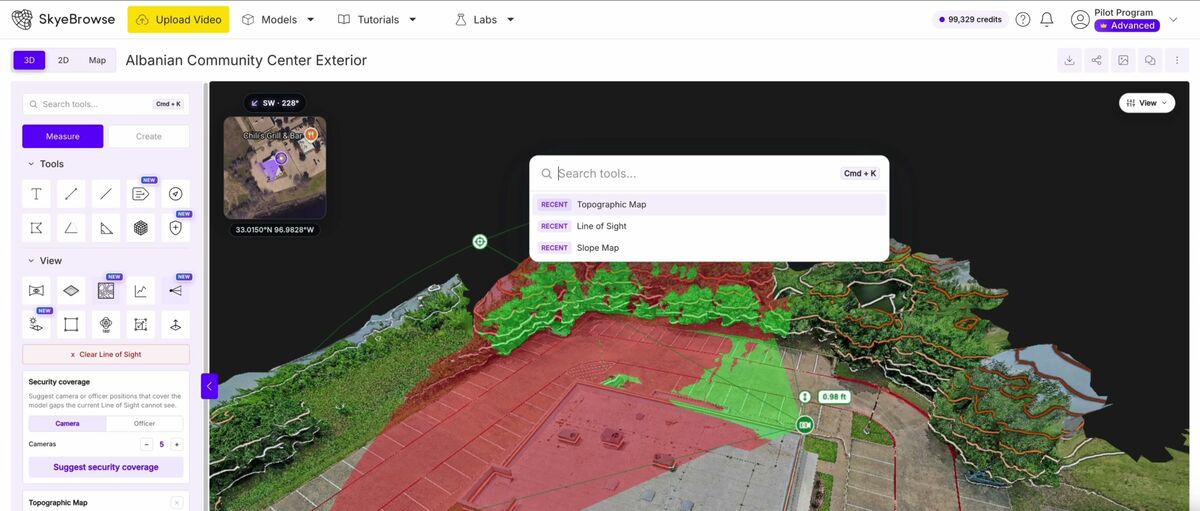
Two workflow features make the viewer fast. The search bar at the top of the tool panel finds any tool by name, and the power search (Cmd+K on Mac, Ctrl+K on Windows) does the same from the keyboard, with your most recent tools surfaced first. Undo and redo buttons at the bottom of the viewer roll back or restore any change, including bulk deletes.
What Are the Measurement Tools?
The Measure tab covers annotations with URLs, images, or saved camera views; a distance tool for point-to-point measurements; a draw tool for lines and arrows; a label tool for 3D text; an icon library for public-safety and pre-plan symbols; and a GPS tool that shows coordinates on georeferenced models. Area, angle, slope, and volume tools round out the set, calculating surface area, angles between points, run/rise/hypotenuse for a slope, and stockpile or earthwork volume directly from the model.
Annotations
Click Annotate, type a name, and place a marker on the model. Annotations go beyond text: attach a URL and clicking the annotation opens the link in a pop-up window, attach images for photo documentation, or use save current view so clicking the annotation flies the camera to a saved perspective. The object tree on the bottom left lists every annotation and measurement in the scene, and each one can be hidden, shown, or deleted from there.
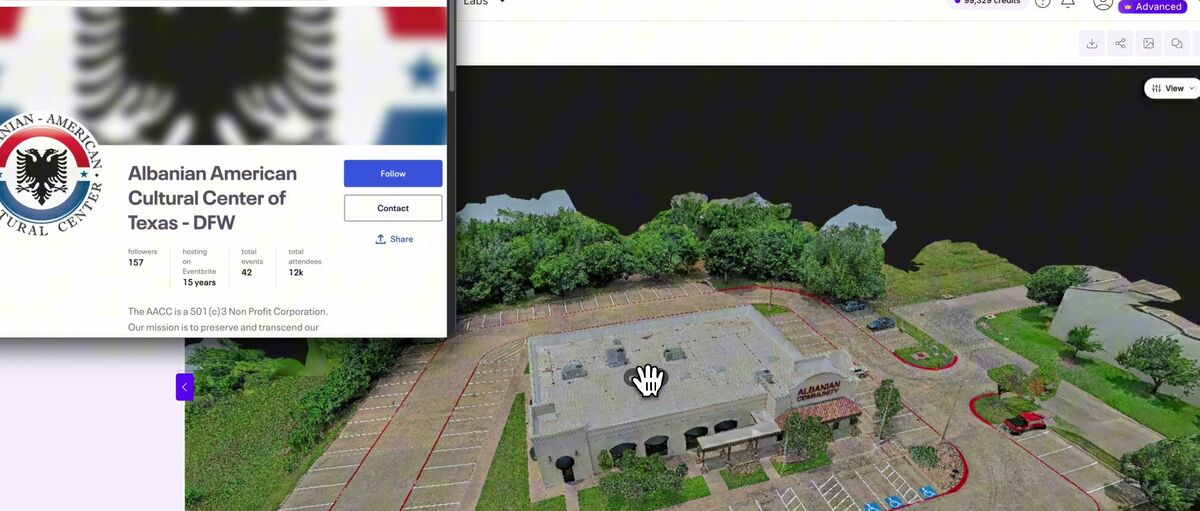
Annotation with an attached URL opening in a pop-up window
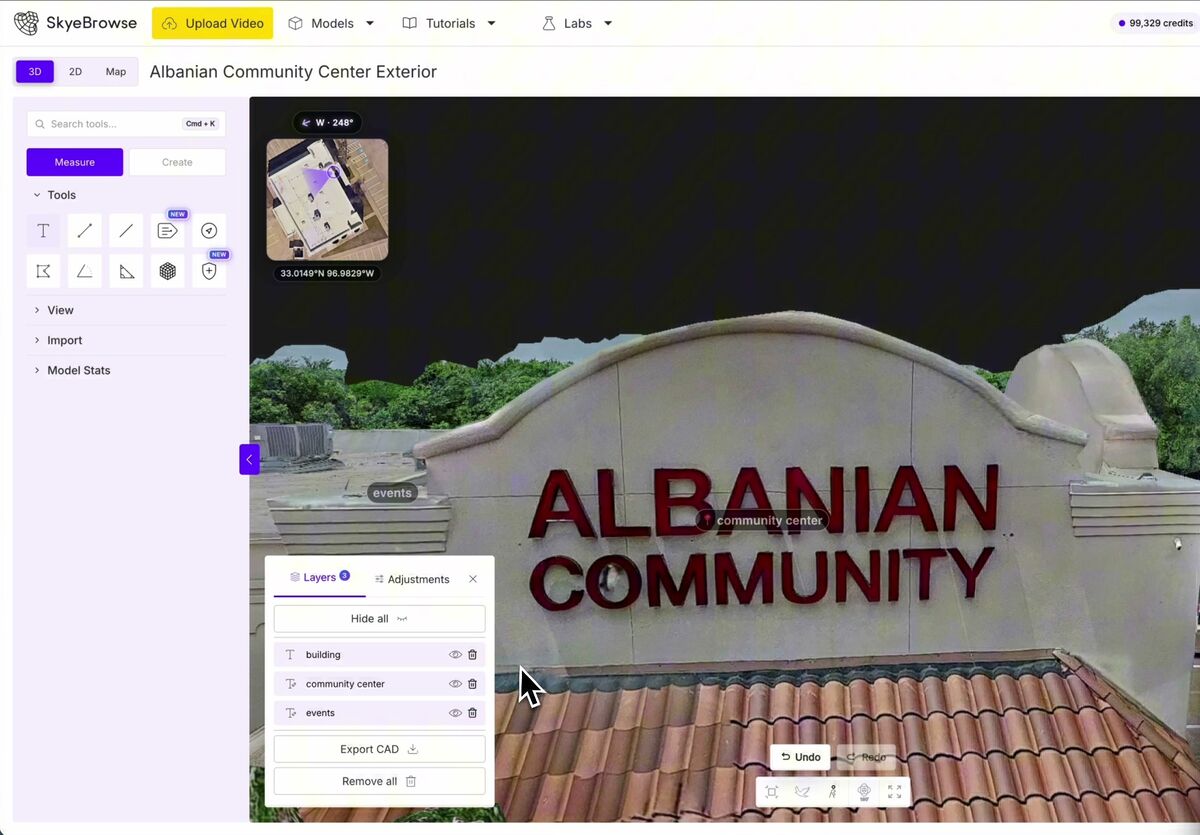
Object tree listing every annotation and measurement in the scene
Distance
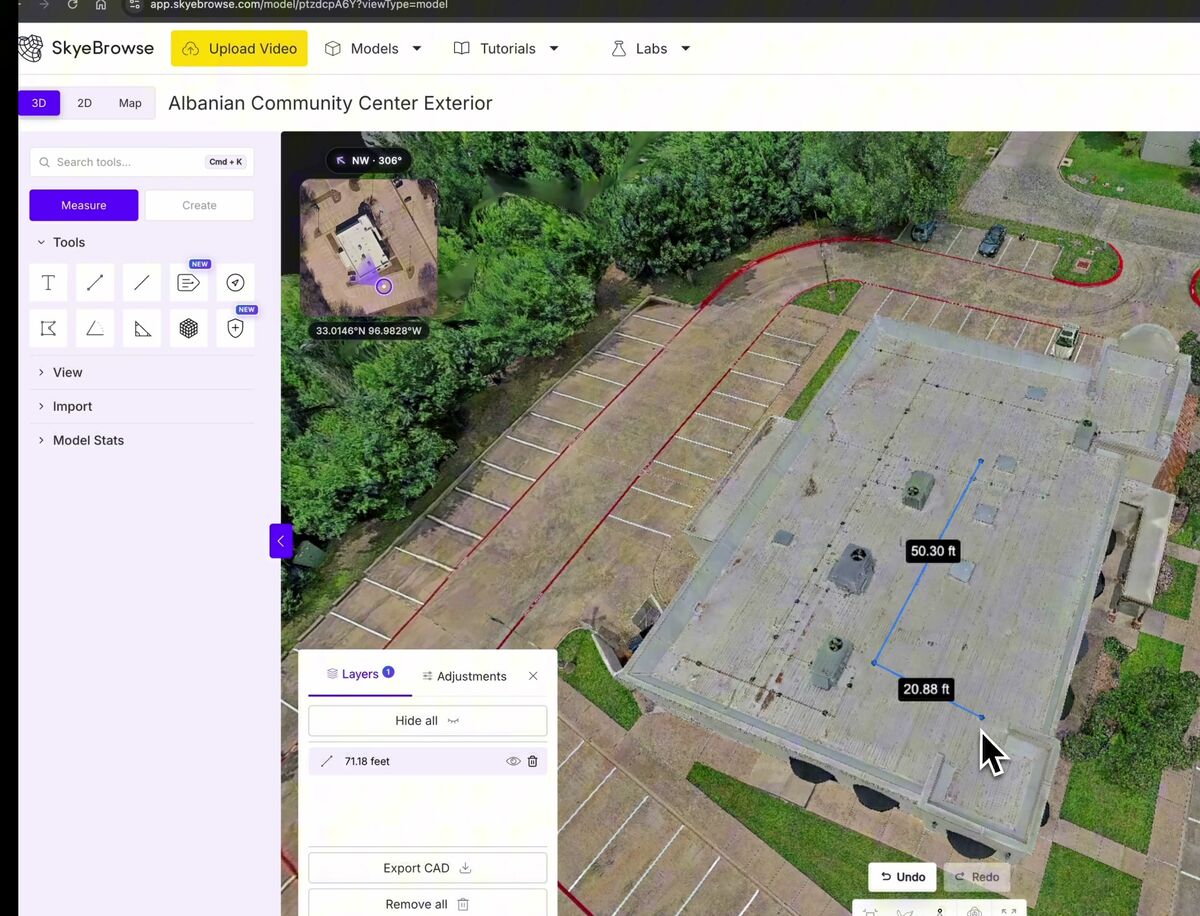
Click two or more points with left click, then right click to finish. The measurement stays editable: hover over a point to drag it, delete individual points, or delete the whole measurement. For best accuracy, look straight down at the model and zoom in before placing points. Measuring at an oblique angle can miss the surface entirely, so position the camera first, then measure.
Draw, Label, and Icons
The draw tool places straight lines, arrows, and multi-point curvy arrows for marking directions of travel. Remove all clears every drawing in one click. The label tool places 3D text onto the model itself, and labels can be moved, rotated, resized, and locked so they are not accidentally dragged later. The icon library is a searchable picker covering fire, law enforcement, and EMS symbology from the NAPSG all-hazards library, plus an NFPA-170-style fire pre-plan set of hydrants, alarm panels, suppression equipment, and facility markers, each resizable and placeable anywhere in the scene.
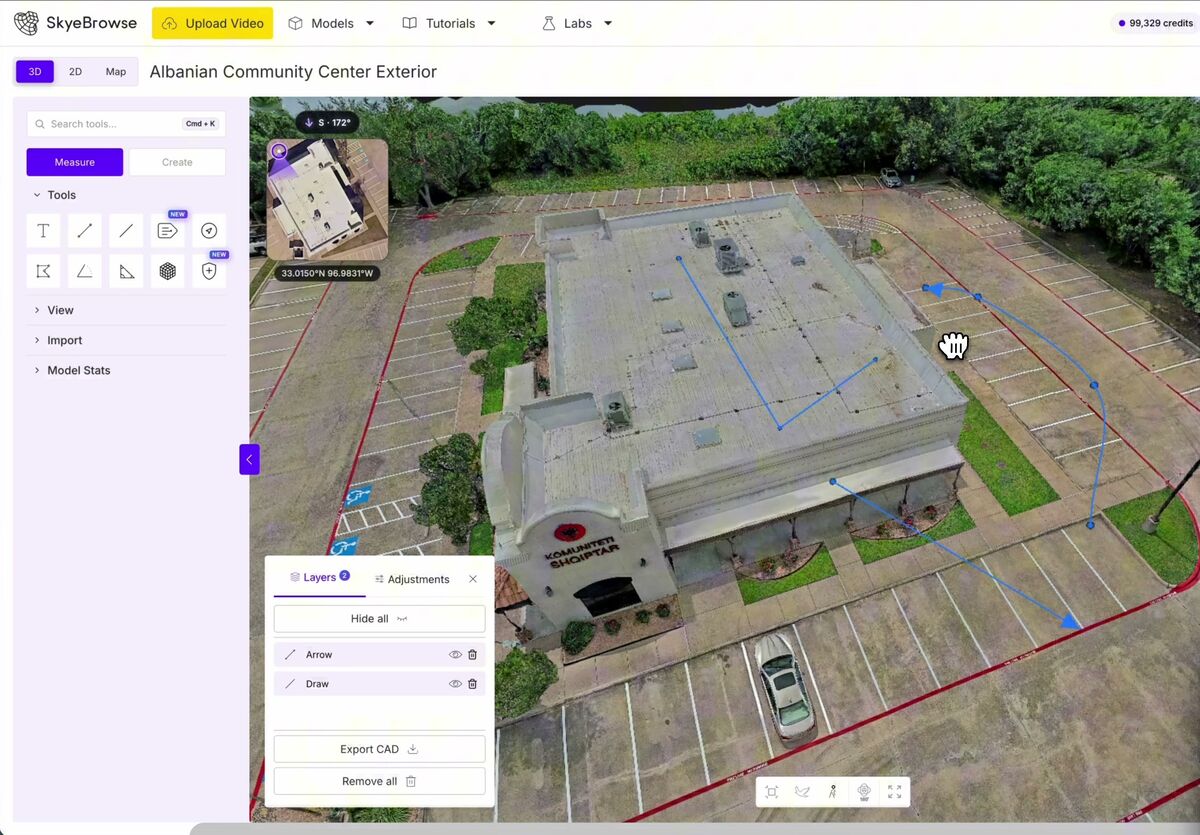
Draw tool with straight lines, arrows, and a curvy arrow
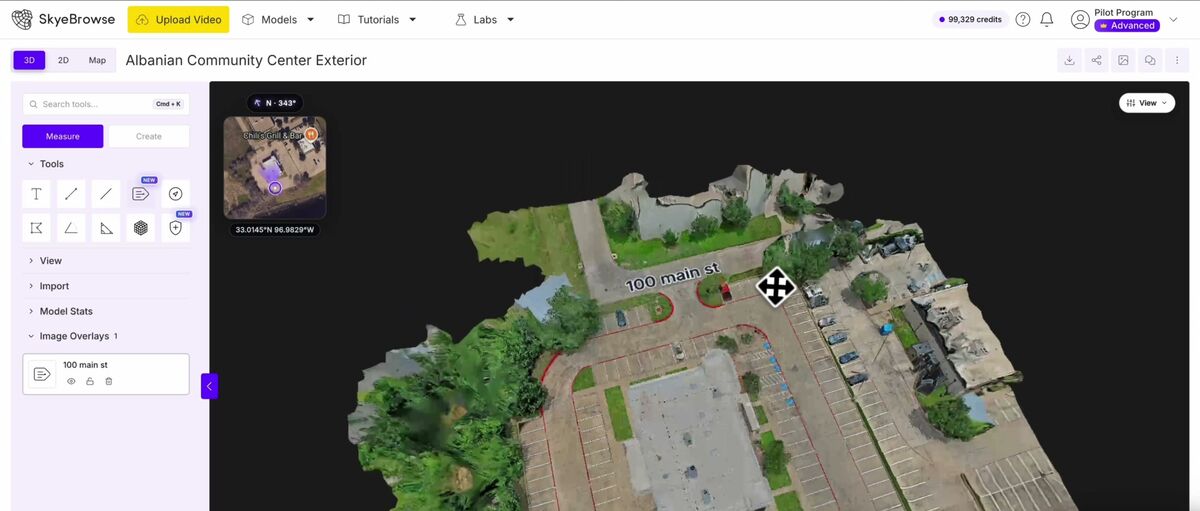
Label tool placing 3D text on the model
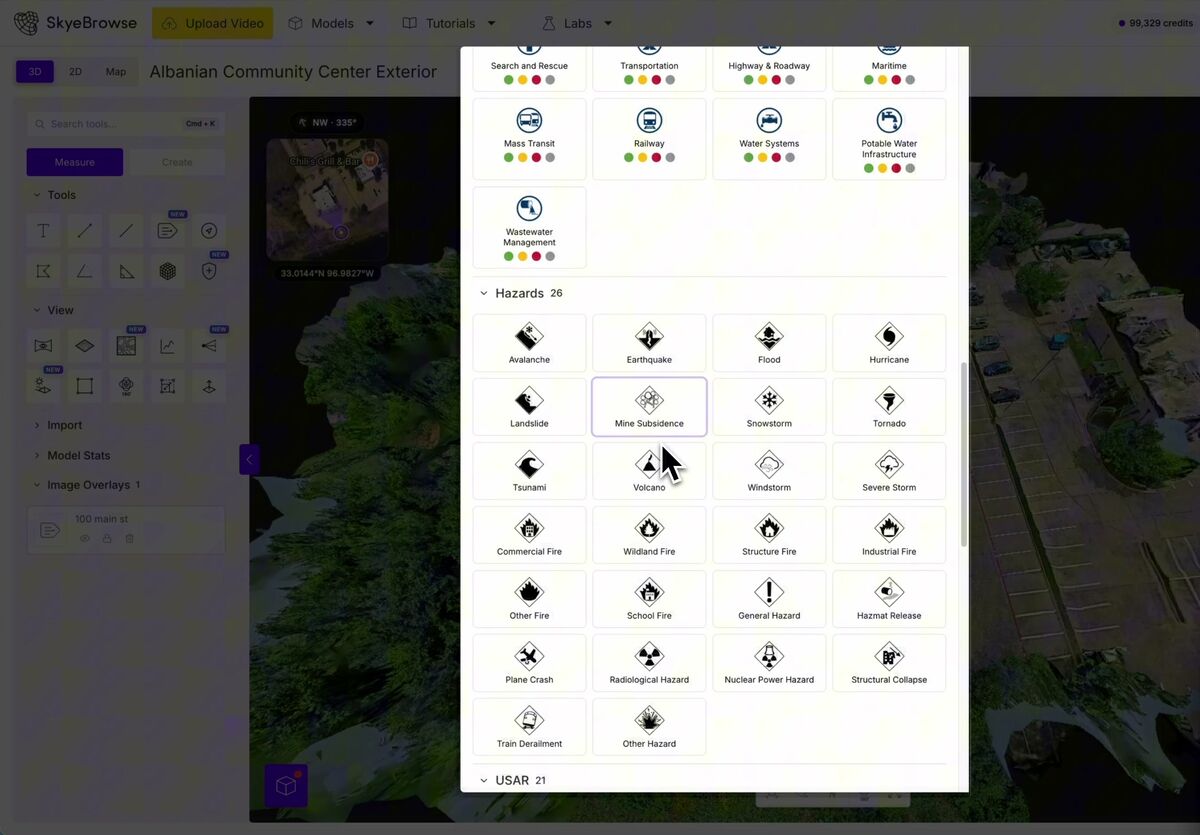
Icon library with public safety and hazard symbols
GPS and Compass
The GPS tool drops a coordinate pin on any point of a georeferenced model, and clicking the mini map opens the location in Google Maps. Coordinates copy with one click for pasting into an MDT, CAD system, ESRI, or a text message. If your model was uploaded with subtitle (SRT) files or flown with the SkyeBrowse Flight App, every point of the model carries GPS coordinates, and the viewer shows a mini map plus a live compass heading as you move the camera.
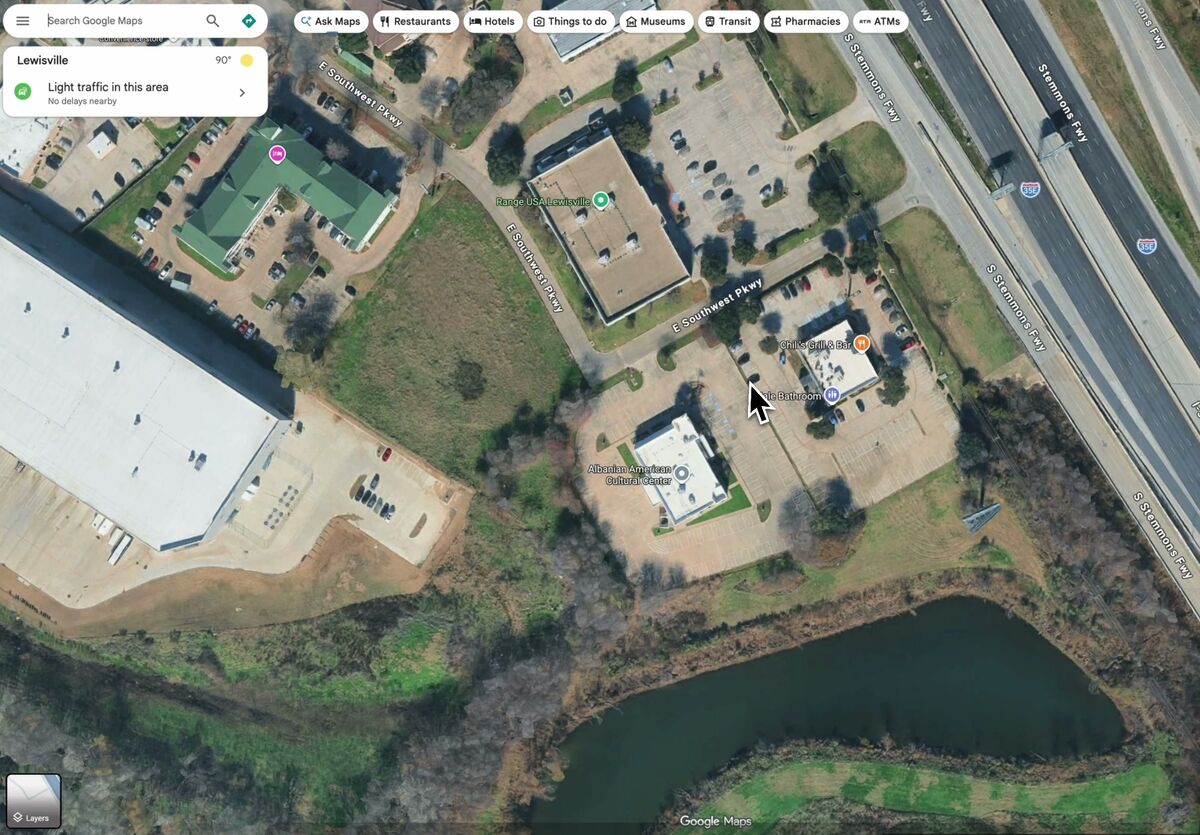
GPS tool opening the pinned location in Google Maps
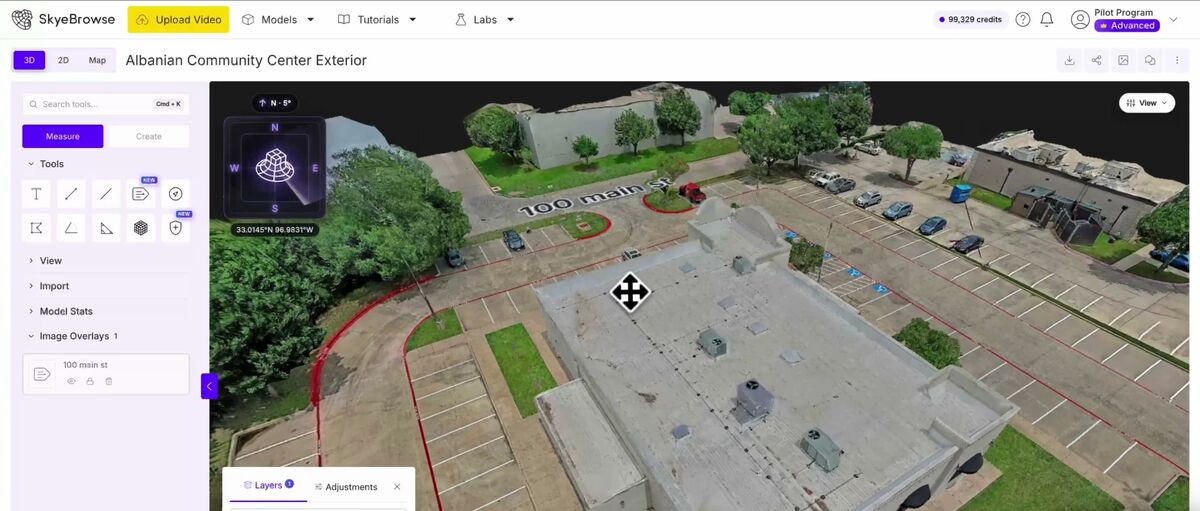
Compass and mini map showing the camera heading
Area, Angle, Slope, and Volume
The area tool calculates surface area as you click around a region, updating live as you drag points. Units switch between imperial and metric under View, then Units. The angle tool measures angles between clicked points, useful for checking a conduit bend or documenting bullet trajectory angles of entry. The slope tool builds a right triangle between two points, returning the run, rise, hypotenuse, and angle in one measurement, which answers questions like how far a ladder truck needs to extend to reach a roofline.
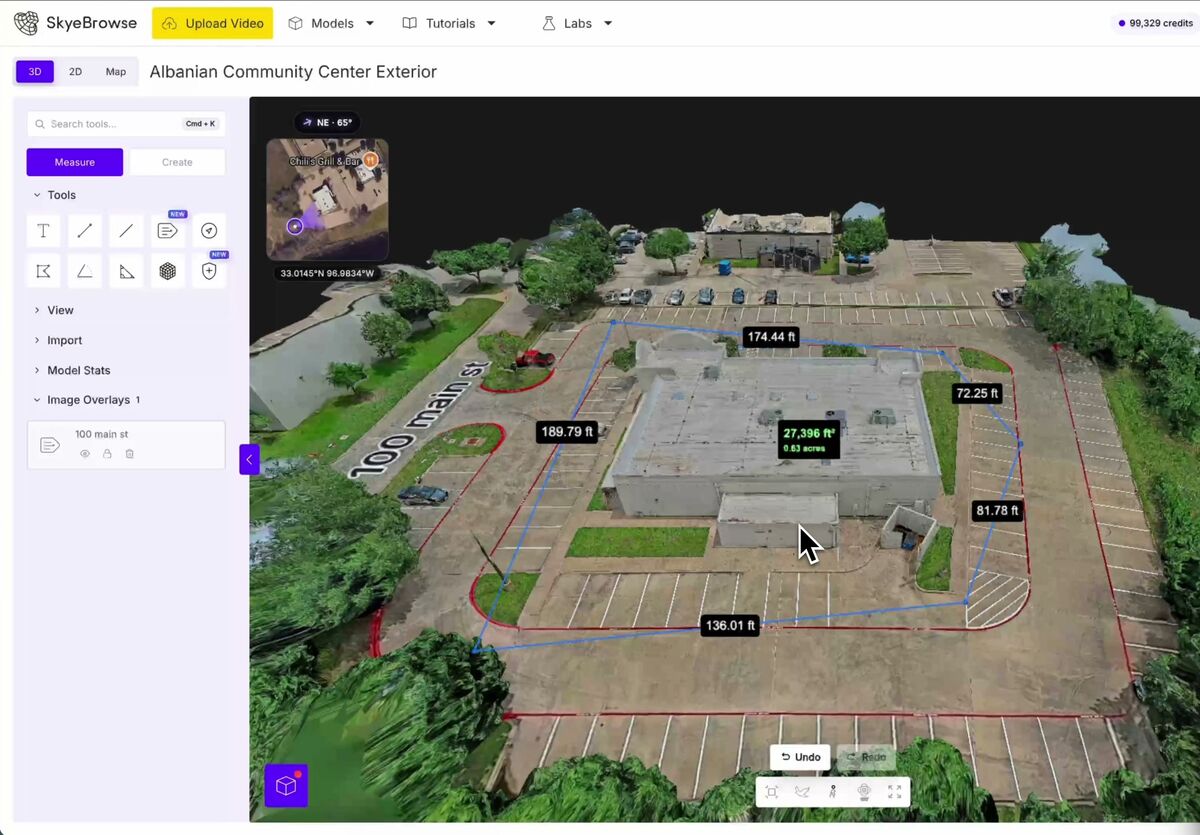
Area tool calculating surface area live
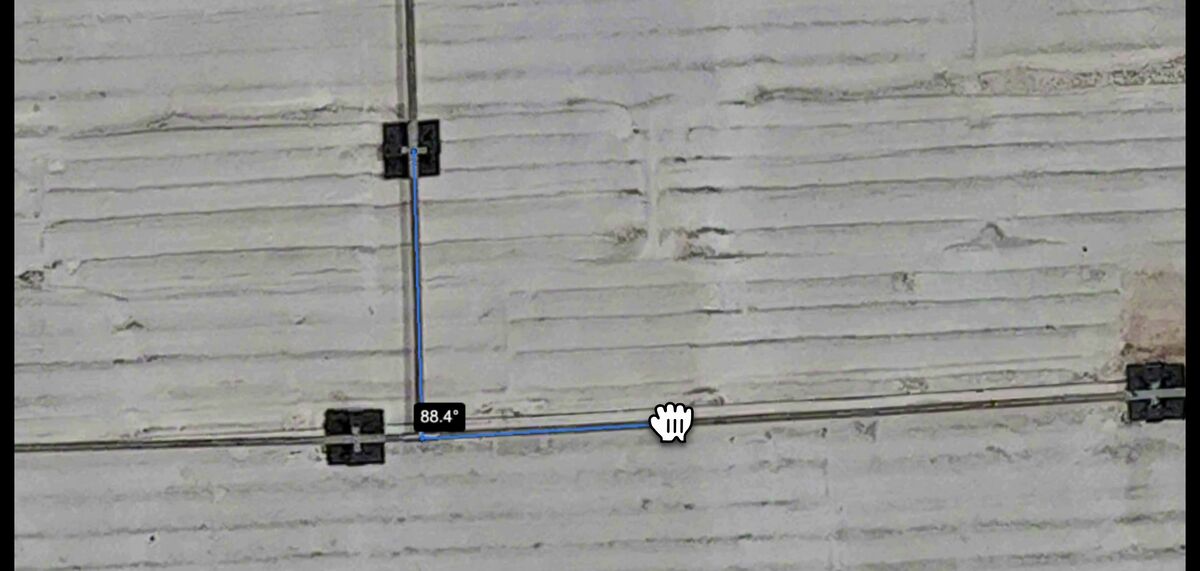
Angle tool measuring an 88.4 degree conduit bend
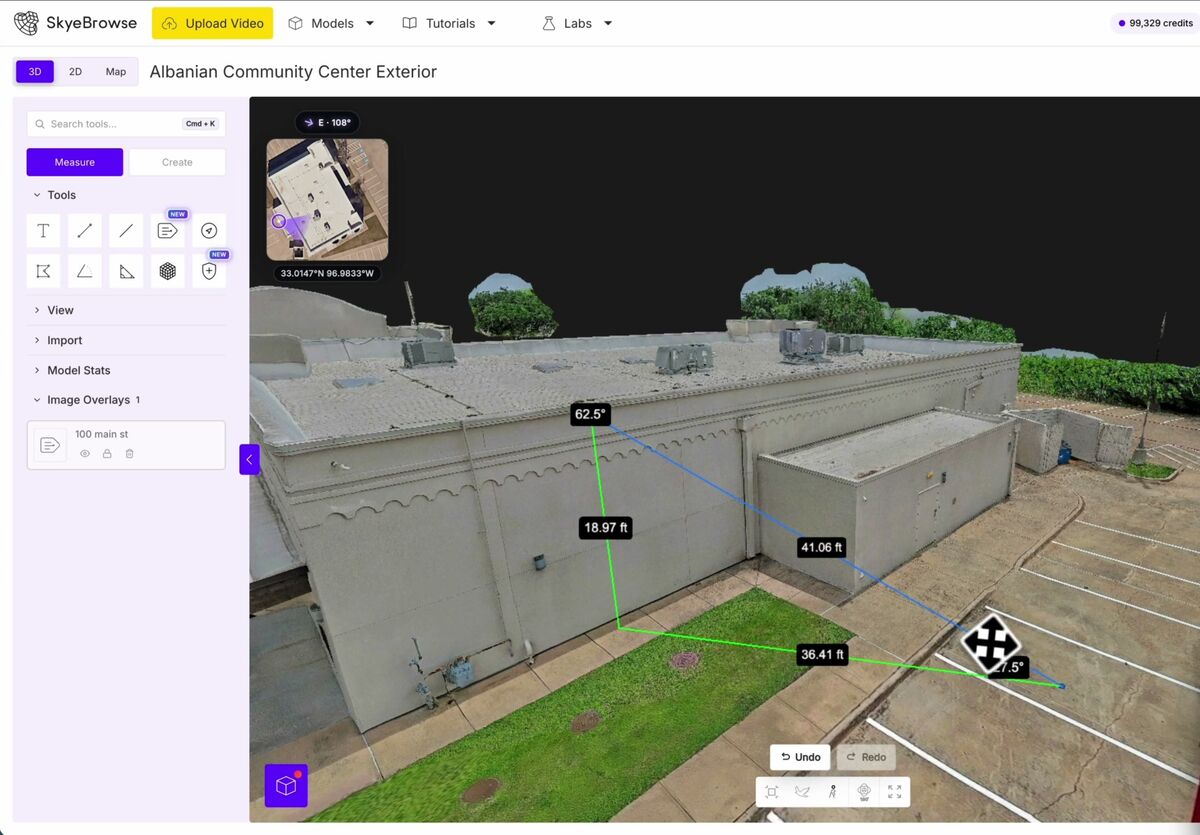
Slope tool returning run, rise, hypotenuse, and angle
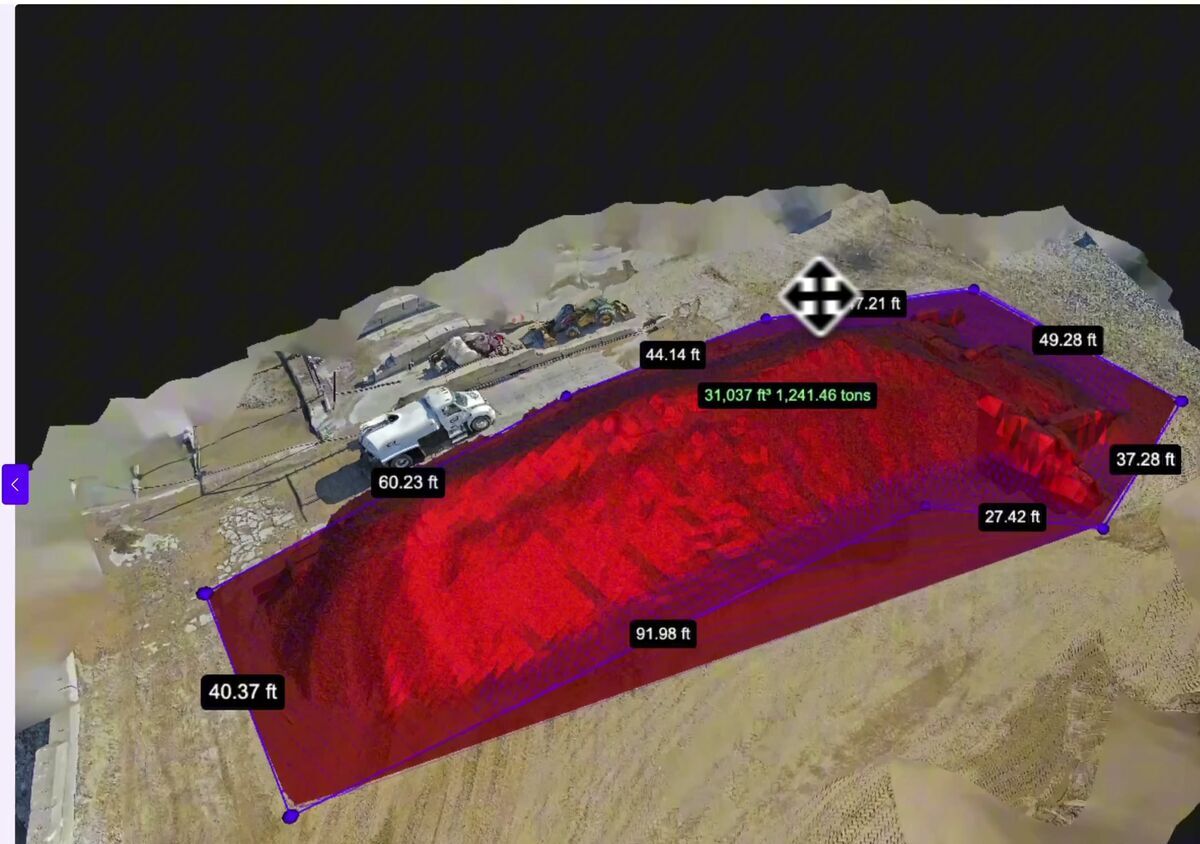
The volume tool calculates stockpile and earthwork quantities directly from the model. Click rough edges around the pile, right click, and the volume appears with tonnage based on a configurable material density (sand, gravel, and other presets included).
What Are the View Tools?
View tools read the model rather than measure it: POV drops you into any point's perspective, the heat map colors the model by elevation, and the topo tool renders configurable elevation contours. The slope map returns a live elevation profile between two points, and line of sight shows what's visible or blocked from a chosen observer point, with a second observer available for a two-way comparison. Clip, flip, scale, and reorient adjust the model itself, isolating a section, correcting orientation, or rescaling a non-georeferenced model from a known distance.
POV, Heat Map, and Topographic Map
The POV tool places you at any point in the scene at eye level, looking out from that perspective, as if you were standing on a roof or at a doorway. The heat map colors the model by elevation, brighter for higher and darker for lower, for instant terrain reading.
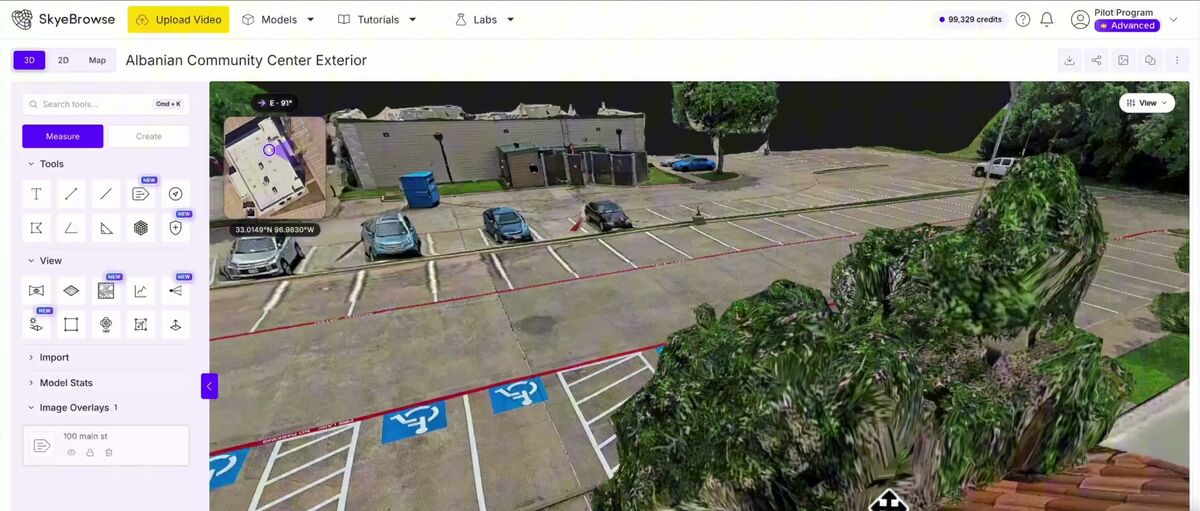
POV tool placing you at eye level on the roof
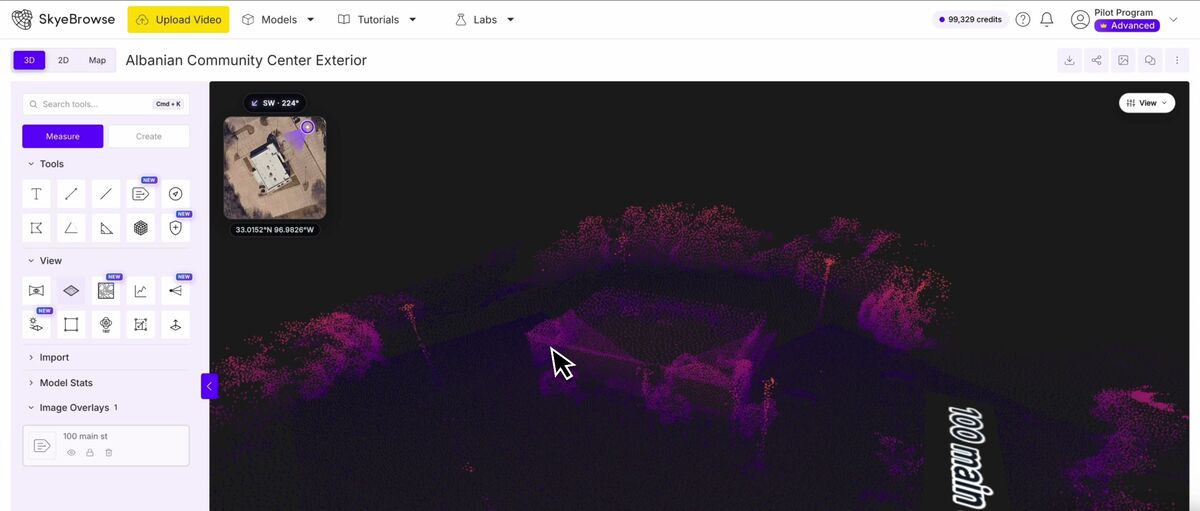
Heat map coloring the model by elevation
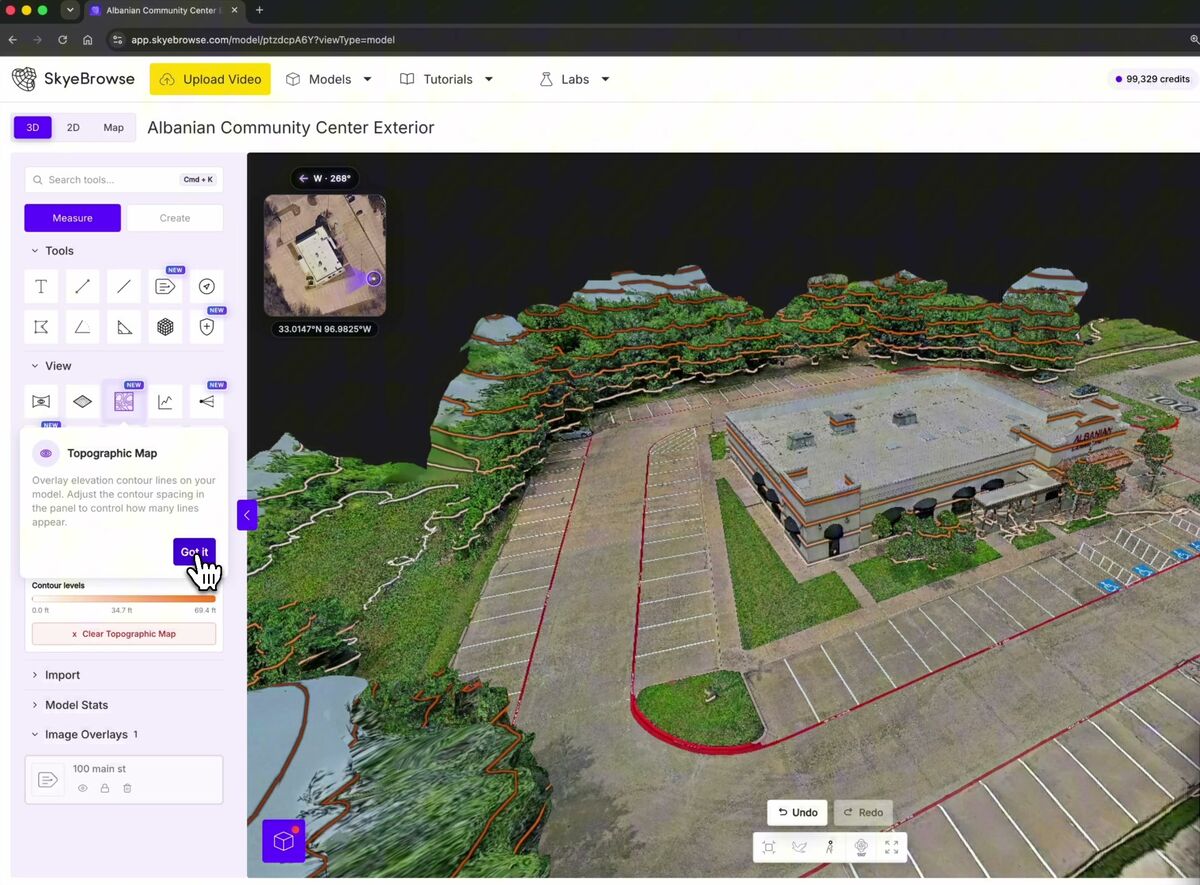
The topo tool converts the model into a topographic map instantly. Contours are fully configurable: set the starting elevation so low ground stays clean, tighten or widen contour spacing with sliders, and read exact elevations off the color-coded contour legend.
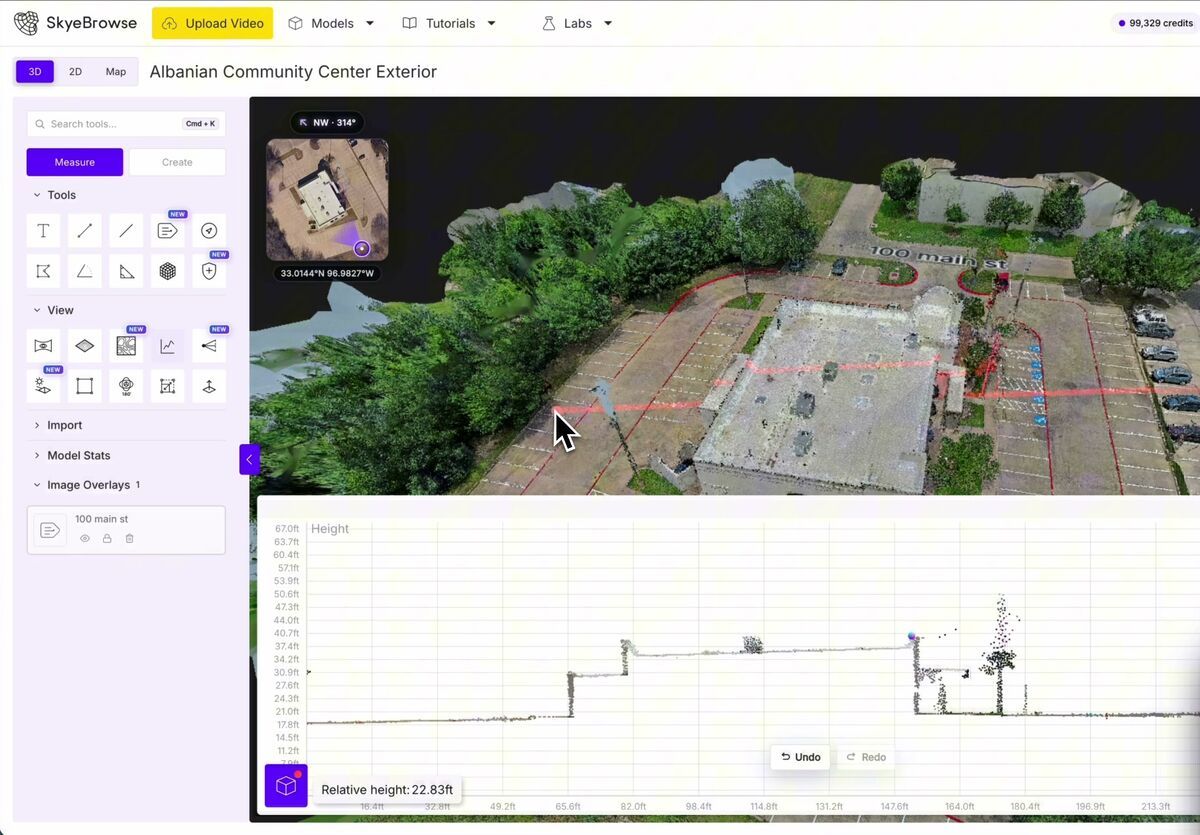
For a cross-section, the slope map takes two left clicks and a right click and returns a live elevation profile along that line, with relative measurements on the X, Y, and Z axes accurate to a tenth of an inch. Move the endpoints and the cross-section updates in real time.
Line of Sight and Security Coverage
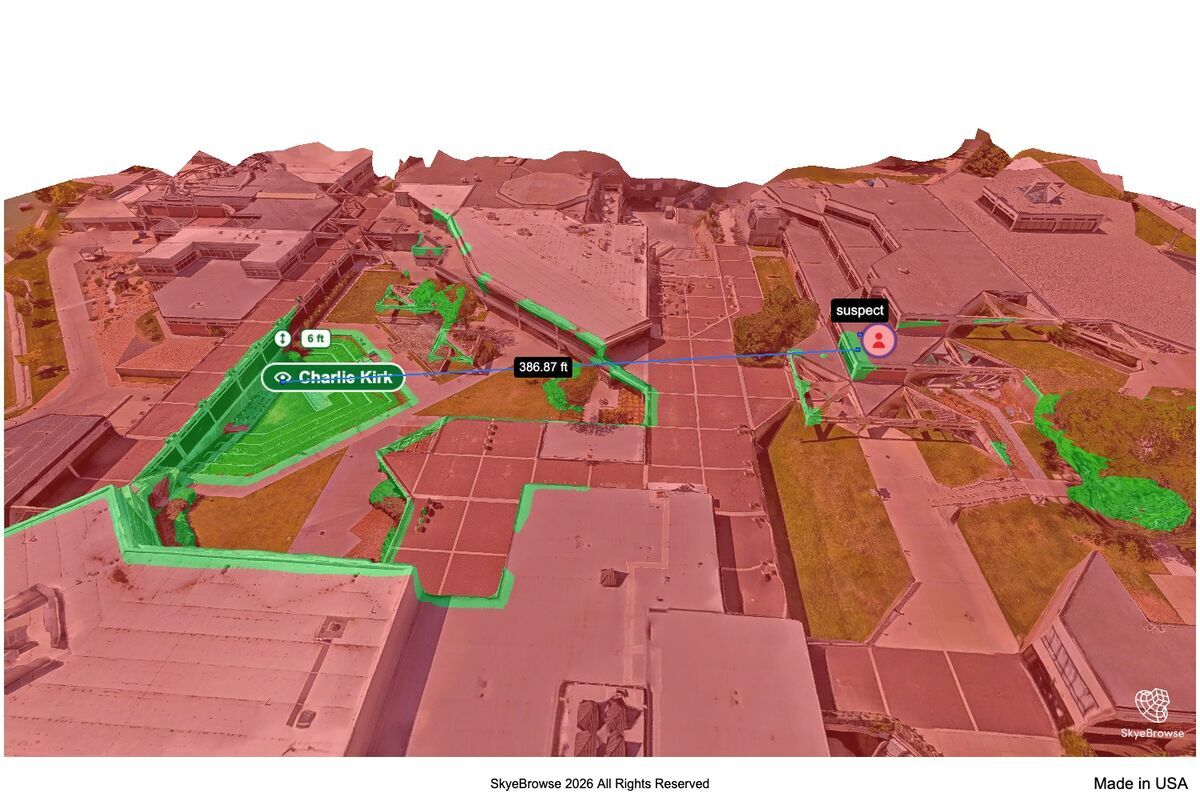
The line of sight tool answers three questions: what can a person see from here, what can a camera see from here, and who can see this spot. Click a location, set the height above the surface (a 6 foot observer, for example), and everything visible from that point renders in green. One click drops you into that person's actual perspective. Flip the mode to who can see me and the model shades red for positions with no view of the subject and green for positions that can see it.
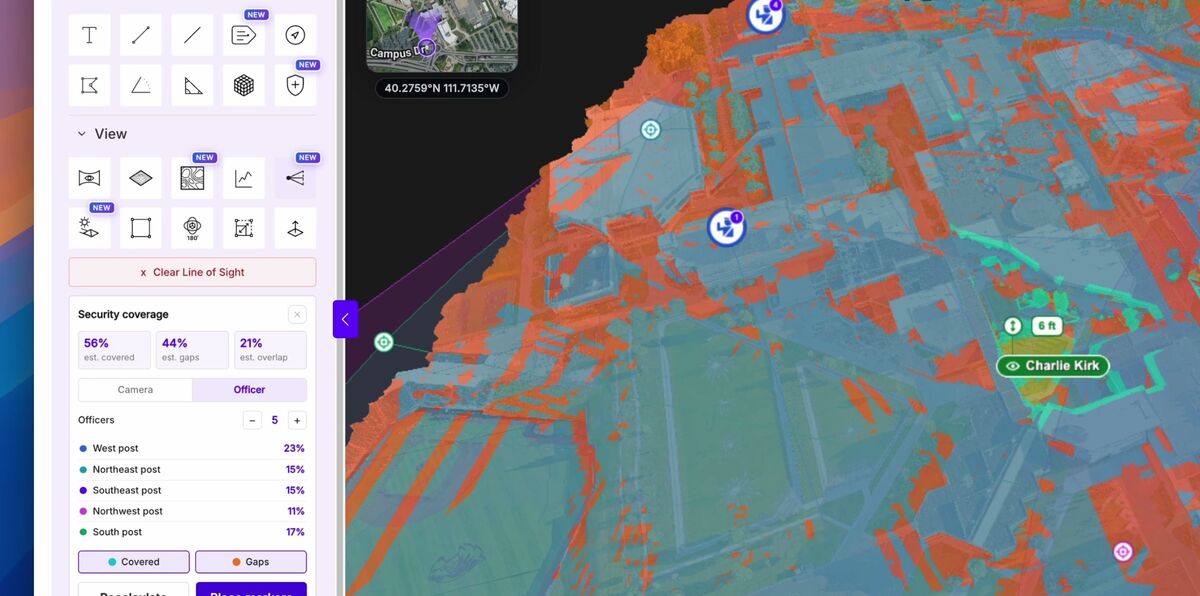
Security coverage takes it further: tell the tool to place five officers, and it automatically positions them across the scene to cover the visible area, including rooftop vantage points, then places markers at each recommended position. Swap officers for cameras to mock up a camera install, and drag any camera down off a pole height to match the real mounting position. For event security, tactical overwatch, and situational awareness planning, this turns a 10 minute drone flight into a full coverage plan.
Sun and Shadow Study
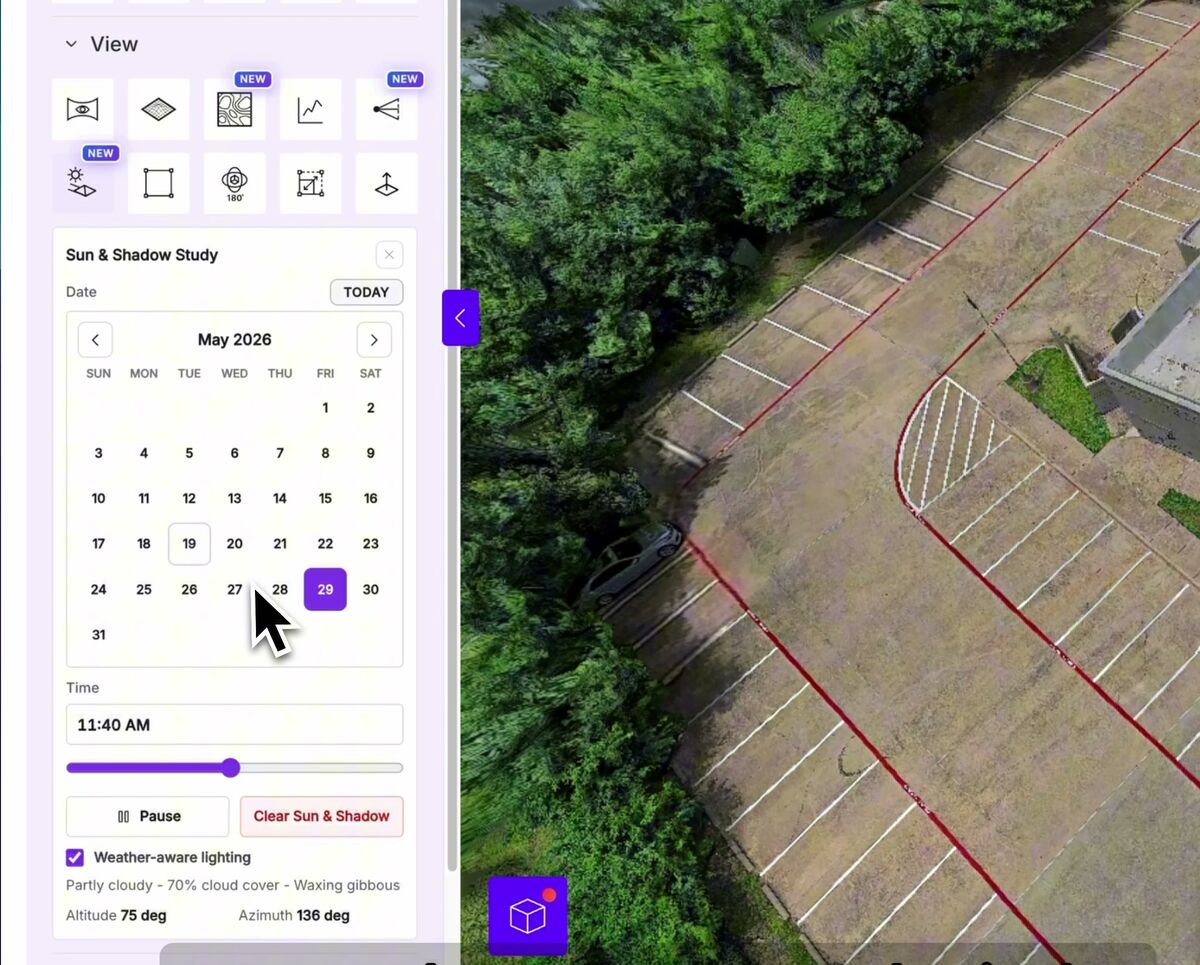
One click turns the model into a sun and shadow study. Pick any date and time, past or future, and play the sun's path across the scene. Weather-aware lighting reflects the actual conditions for that day, including cloud cover. Investigators use it to document exactly where shadows fell at a specific time of day, and solar installers use it to find panel placements that minimize shading.
Clip, Flip, Scale, and Reorient
The clip tool segments the model with a bounding box: keep only the inside to isolate a single building, or cut the inside out to remove it, with draggable and rotatable sliders. The flip tool turns the model right side up if it processed upside down. The scale tool rescales any non-georeferenced model from one known measurement: click two points, enter the true distance, and every measurement in the model rescales instantly. The reorient tool levels a slanted model from three clicks on any flat ground surface.
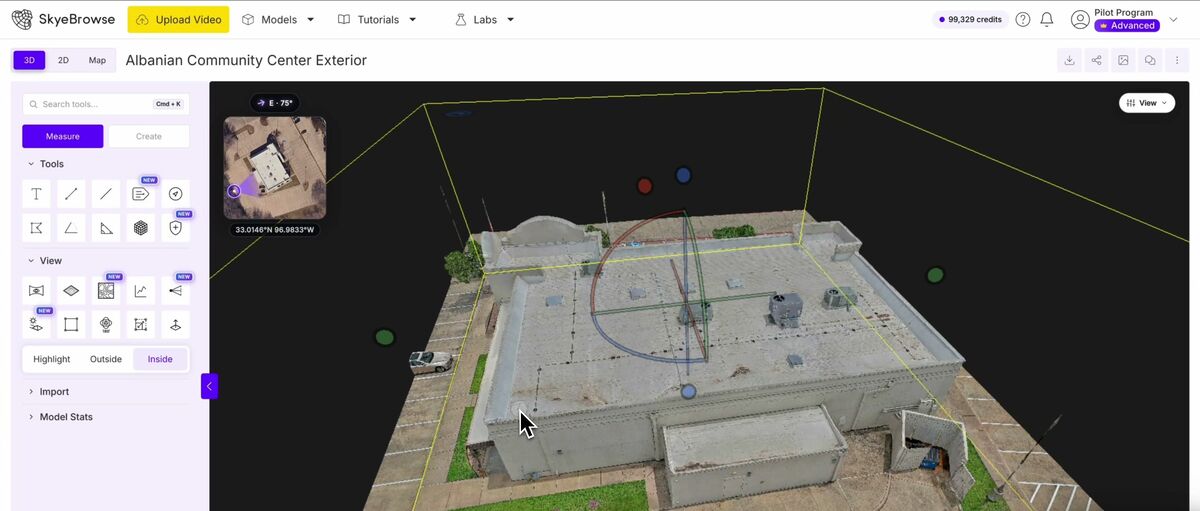
Clip tool isolating a single building
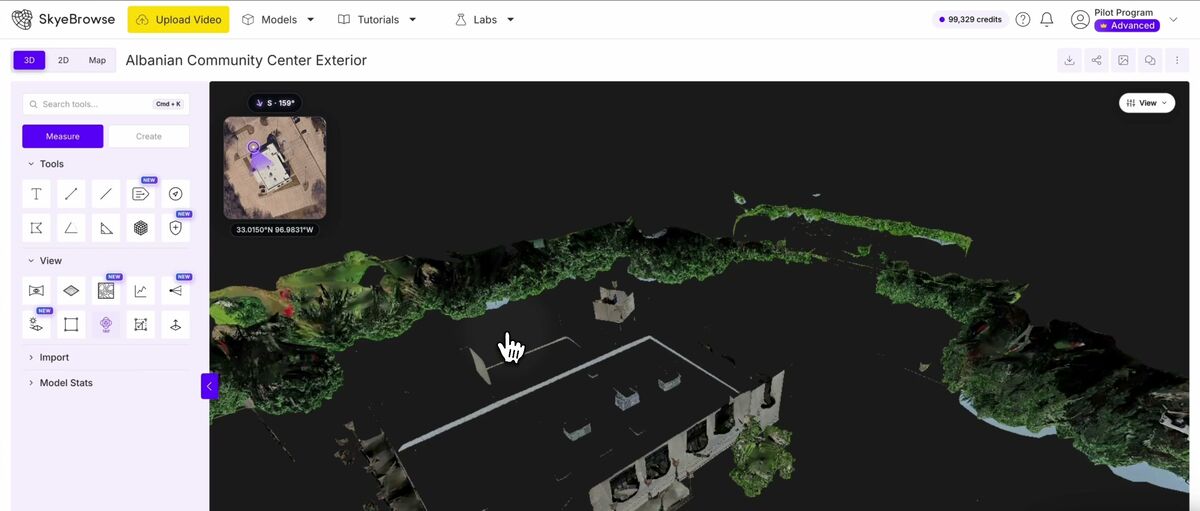
Flip tool for upside down models
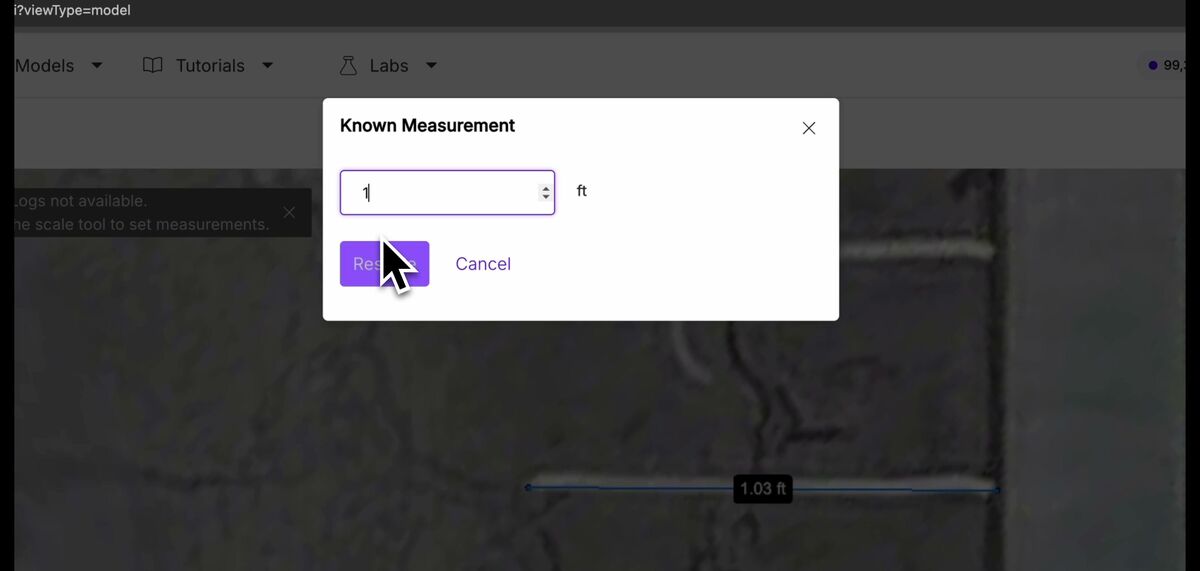
Scale tool rescaling from a known measurement
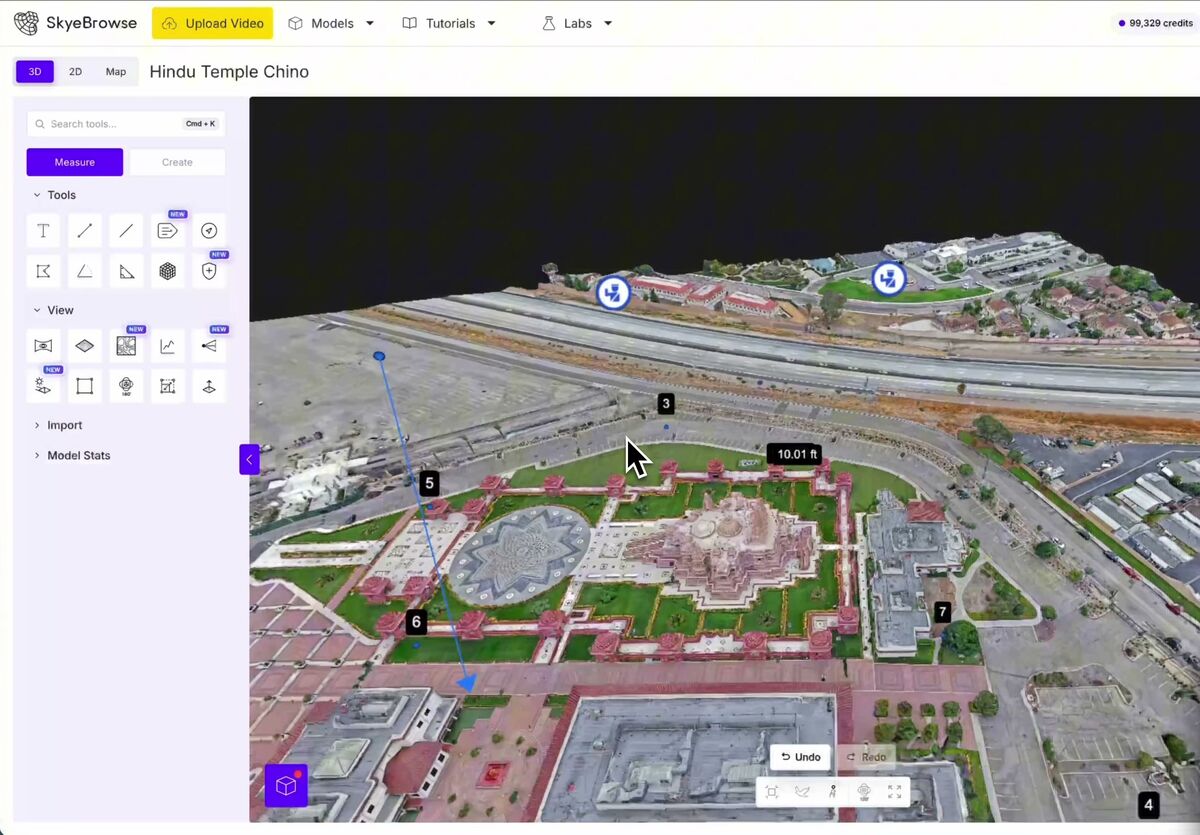
Reorient tool leveling the model from three ground clicks
Can You Import Images and Other 3D Models?
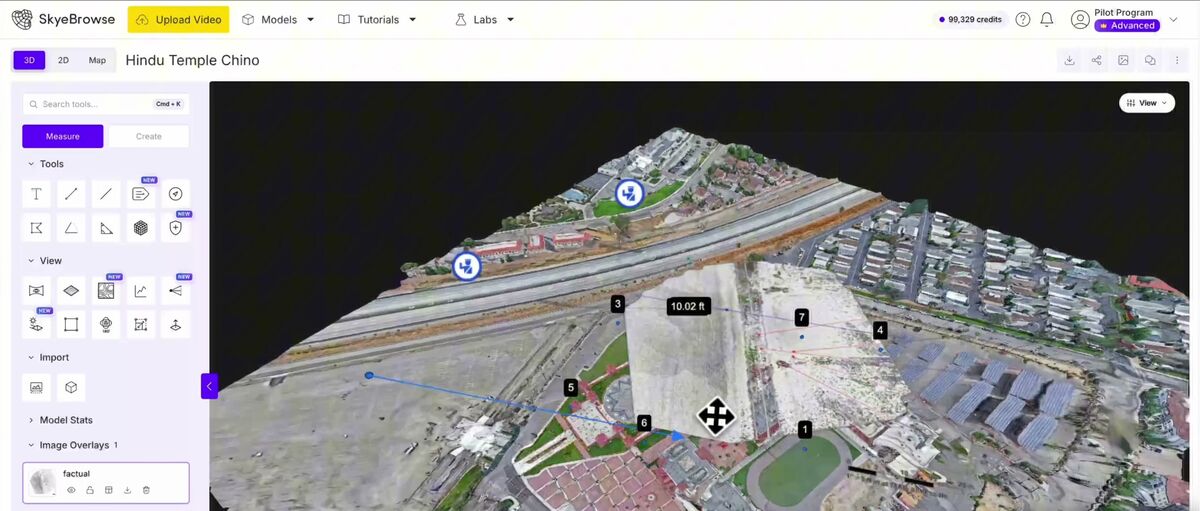
Yes. Image overlay pins a reference image onto the model with positioning, scaling, and opacity controls, useful for dropping a factual diagram or floor plan back onto the scene it came from. 3D overlay combines multiple model layers in one viewer session, such as an interior model stacked inside an exterior model, so both can be explored in a single merged scene.
The import tools at the bottom of the Measure tab bring outside content into the scene. Import an image, make its background transparent, and overlay it on the model, which is how a factual diagram or floor plan drops back onto the scene it came from. Imported images move, rotate, and resize like any other object.
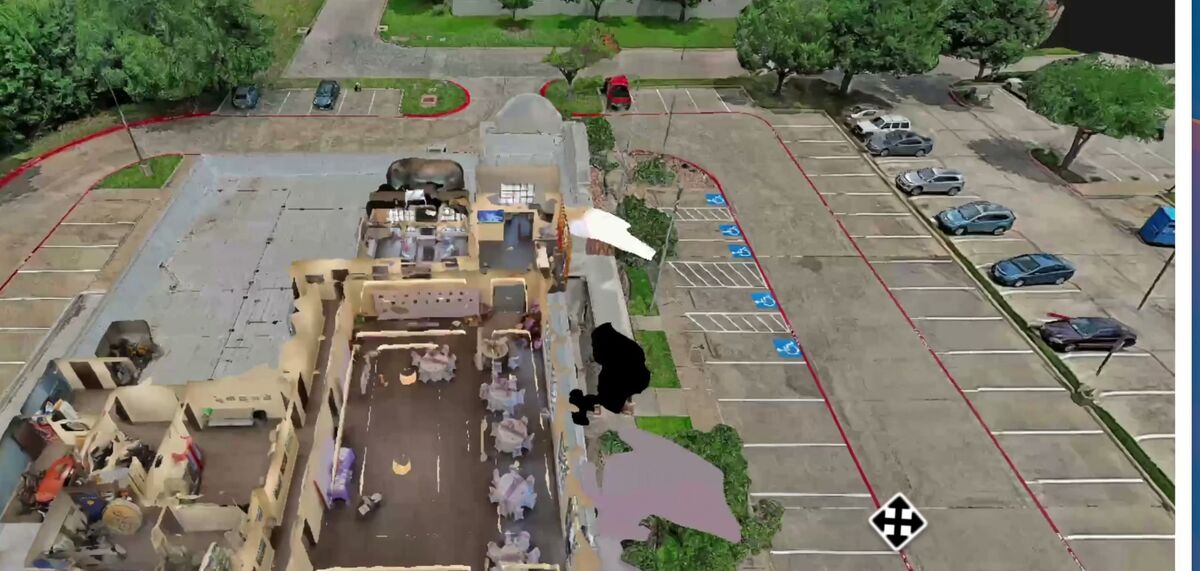
3D overlays import entire SkyeBrowse models into the current scene. Map a building exterior with a drone, walk the interior with a 360 camera, then overlay the interior model inside the exterior. Resize handles, arrow keys, and rotation controls (press R to rotate, E to move) align the two models, and each overlay layer can be hidden, locked, or deleted from the layer list.
What Can You Create and Export?
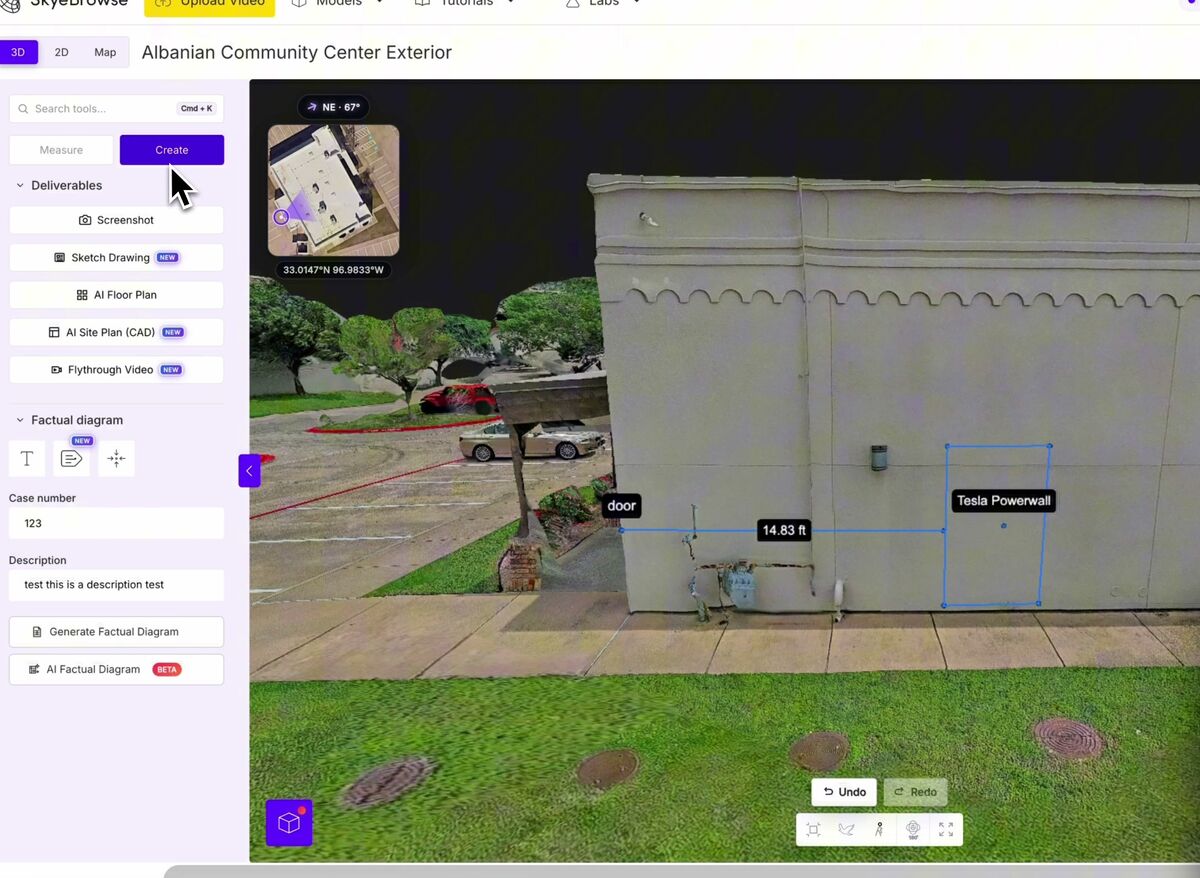
The Create tab produces deliverables you can share or export: screenshots, sketch drawings, AI floor plans, and AI site plans (CAD) that export as images or DXF for CAD software. Flythrough video records the model in HD or 4K, and the factual diagram tool generates a court-ready PDF built from your annotations, reference point, and measurements.
The Create tab holds the deliverables, everything you can share and export out of SkyeBrowse.
Screenshot and Sketch Drawing
The screenshot tool captures the current view or the entire scene, and annotations and measurements appear in the capture. Georeferenced models stamp the compass heading, and full-scene captures add a north-up compass and scale bar. The sketch drawing generates a clean line-art sketch of the current view or a top-down sketch of the entire scene, with a slider to darken or lighten line weight.
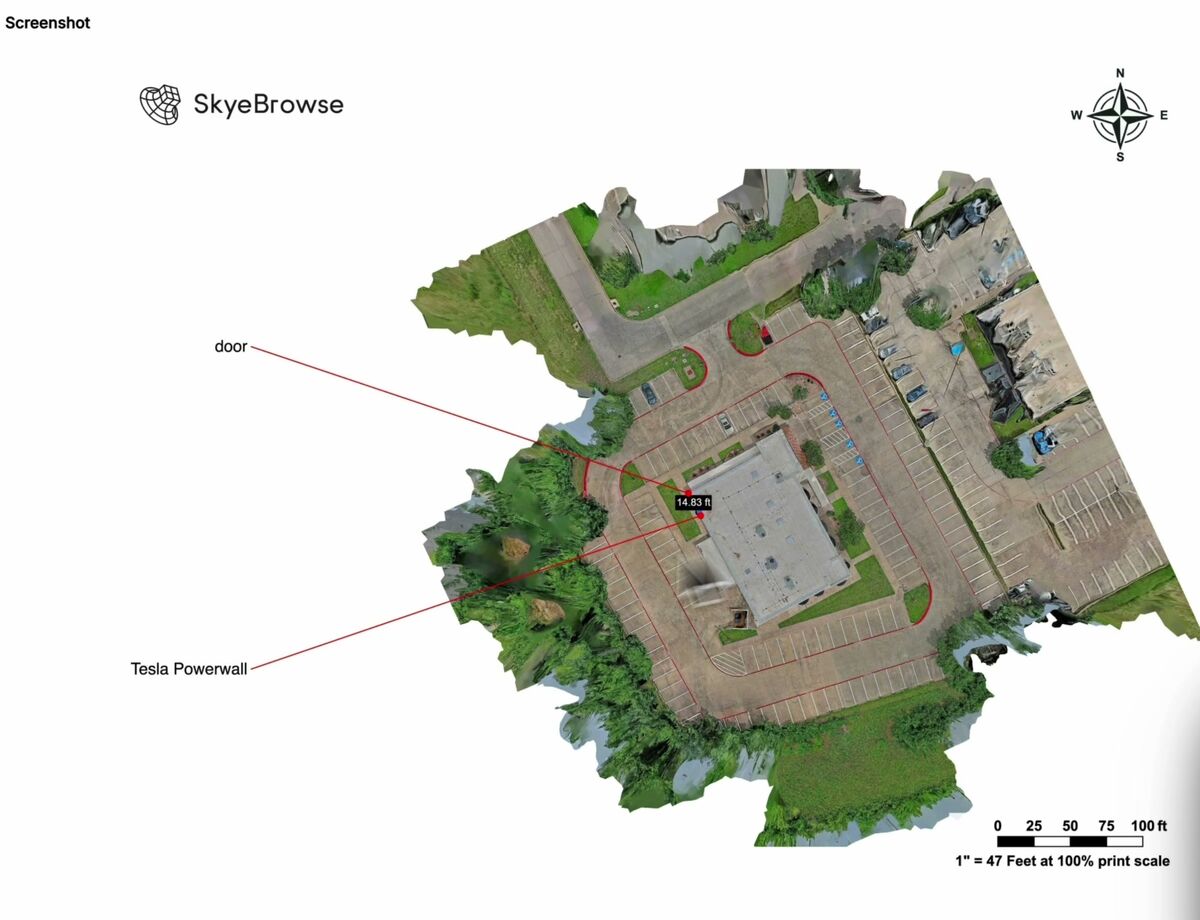
Full scene screenshot with north up compass and scale bar
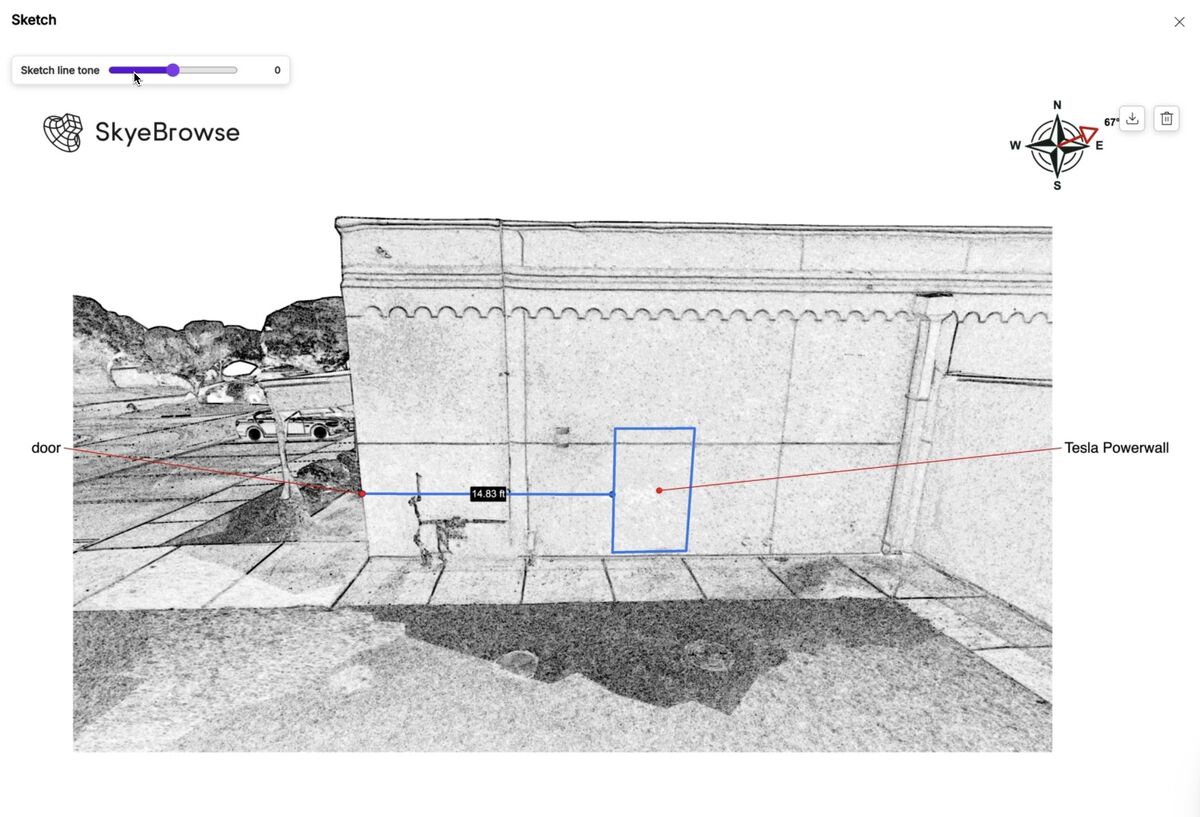
Sketch drawing generated from the current view
AI Floor Plan and Site Plan (CAD)
The AI floor plan generates a floor plan from an interior model, for a selected area or the full model, and overlays it in place on the scene. The AI site plan traces the model with AI and returns a CAD site plan. Download it as an image or as a DXF, an open format that works with virtually every CAD package. The wall elevation option traces a vertical wall instead: click a few points along the wall and get its outline with measurements and annotations, also exportable as DXF. Together these three tools cover the plan, floor, and elevation sheets of a typical set of as-built drawings.
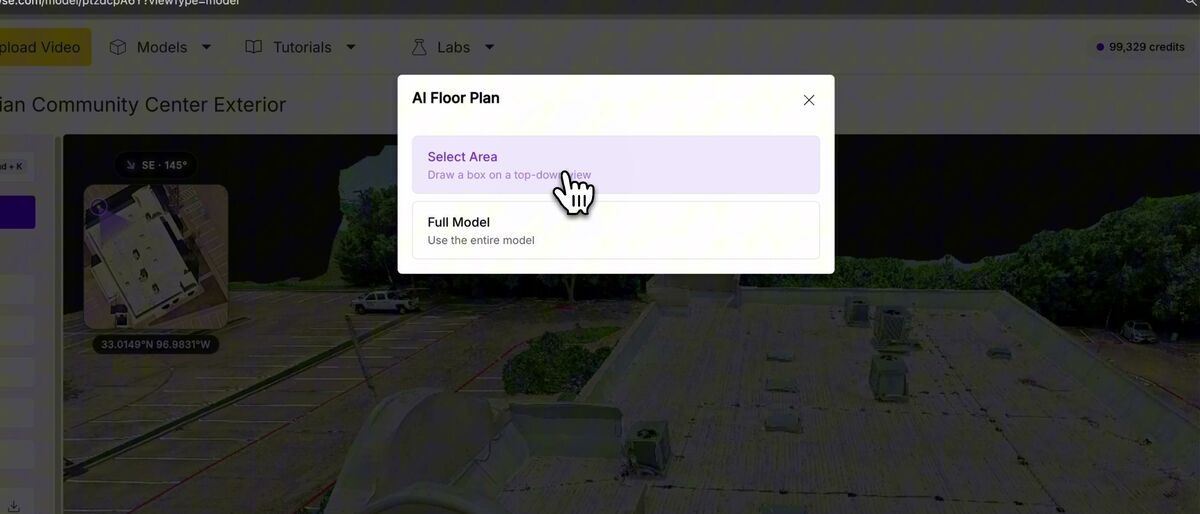
AI floor plan options for a selected area or the full model
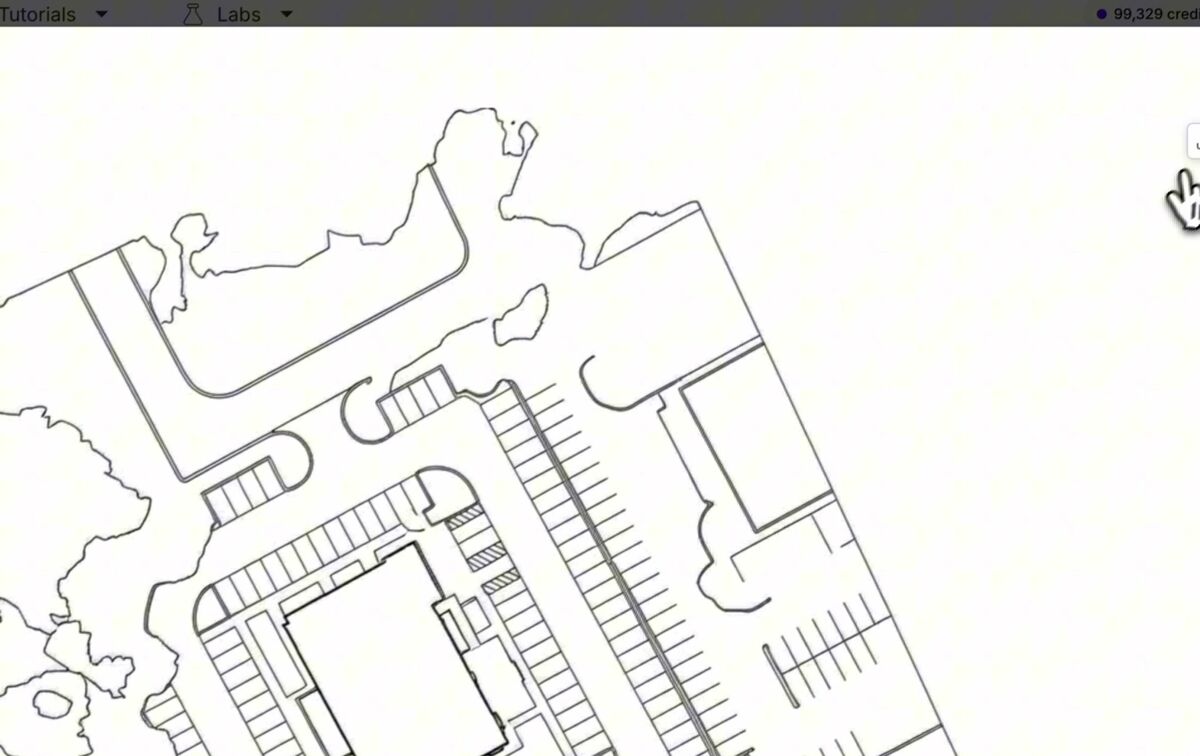
AI site plan traced into a CAD line drawing
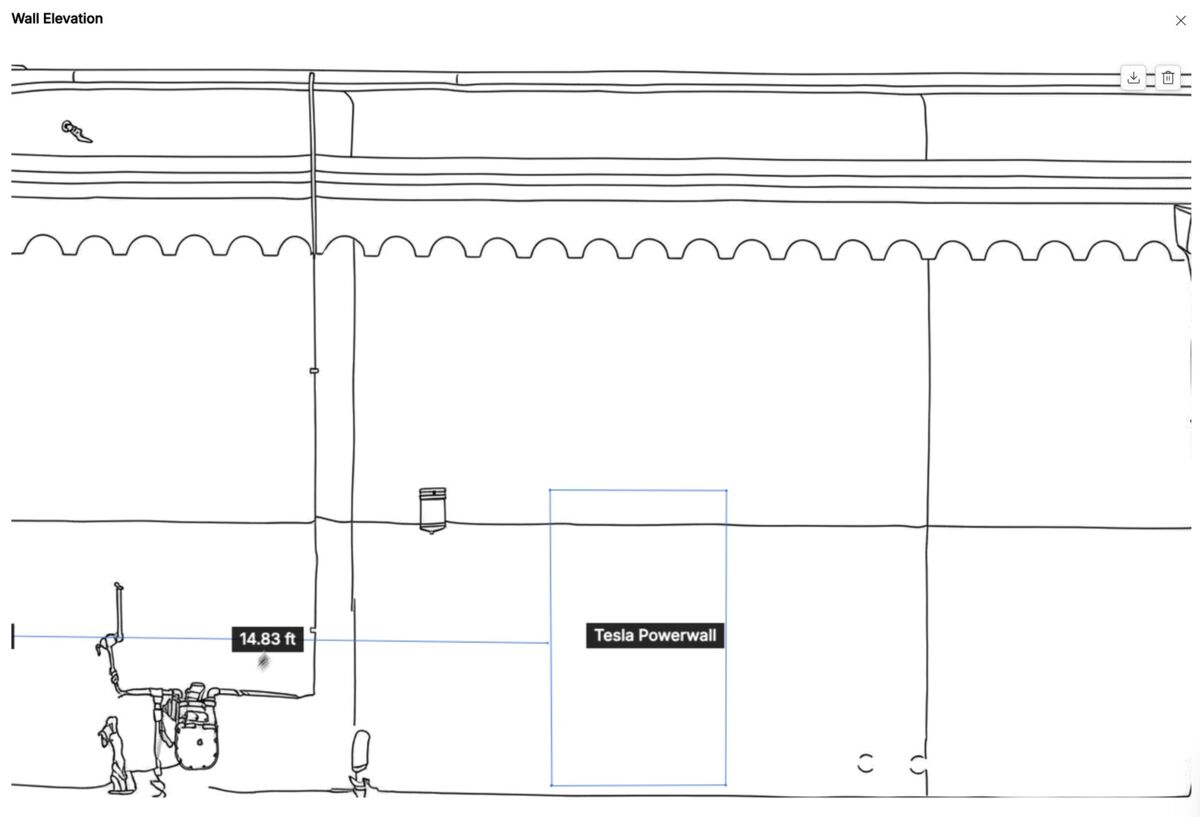
Wall elevation with measurements, exportable as DXF
Flythrough Video and Factual Diagram
The flythrough video tool records automated videos of the model in HD or 4K at your chosen length. The Measurement Tour option flies the camera to every measurement in the scene automatically and finishes with a download to your machine. The factual diagram is built for accident reconstruction: place your annotations, add a label, set a stationary reference point, enter the case number and description, and generate. The output is a four page PDF containing a top-down overview with compass and scale bar, the factual diagram with sketch and annotations, a measurement table relative to the reference point on the X, Y, and Z axes, and your written description.
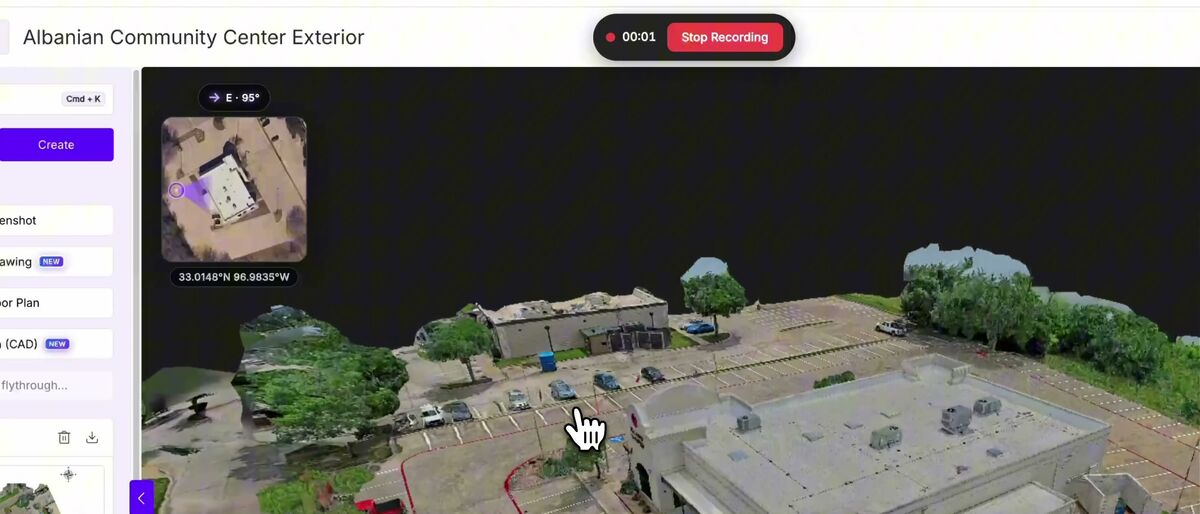
Flythrough video recording a measurement tour
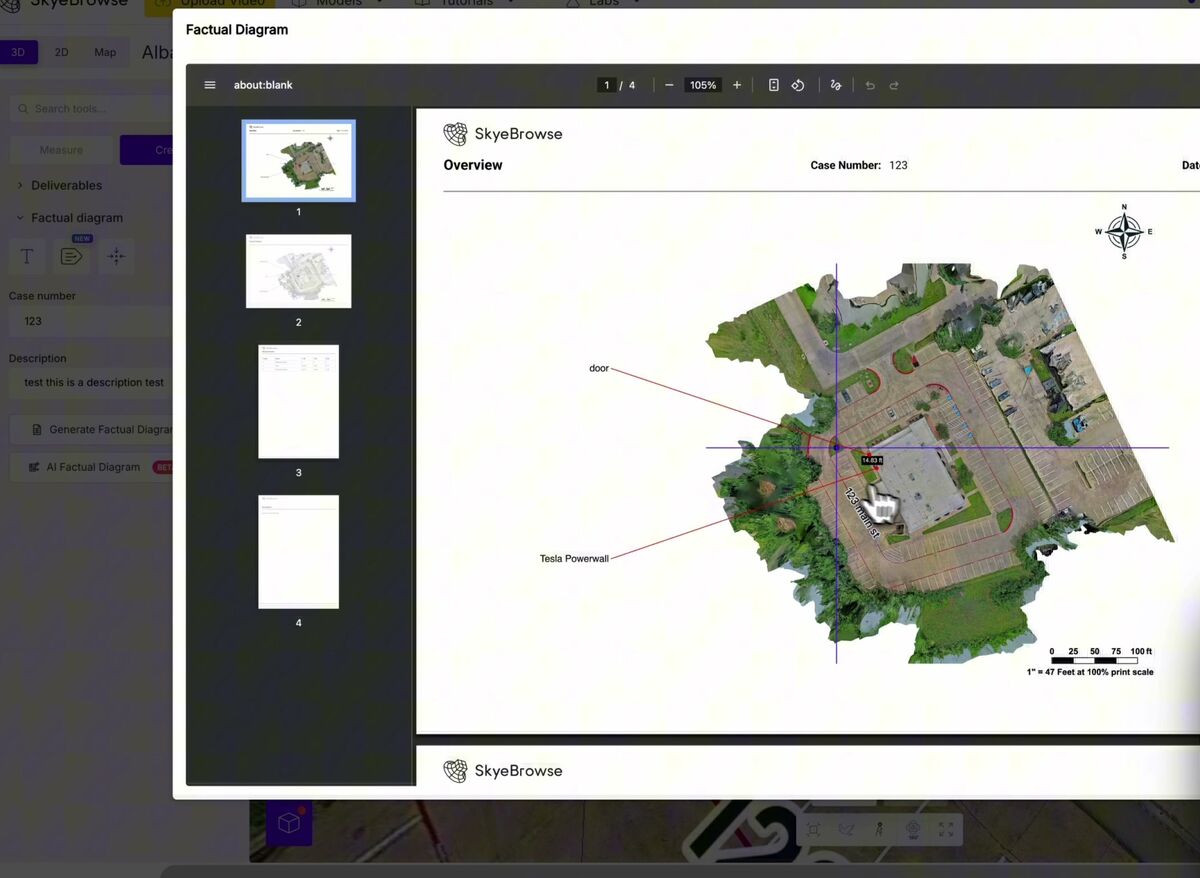
Factual diagram PDF with top down overview and compass
How Do You Share a 3D Model?
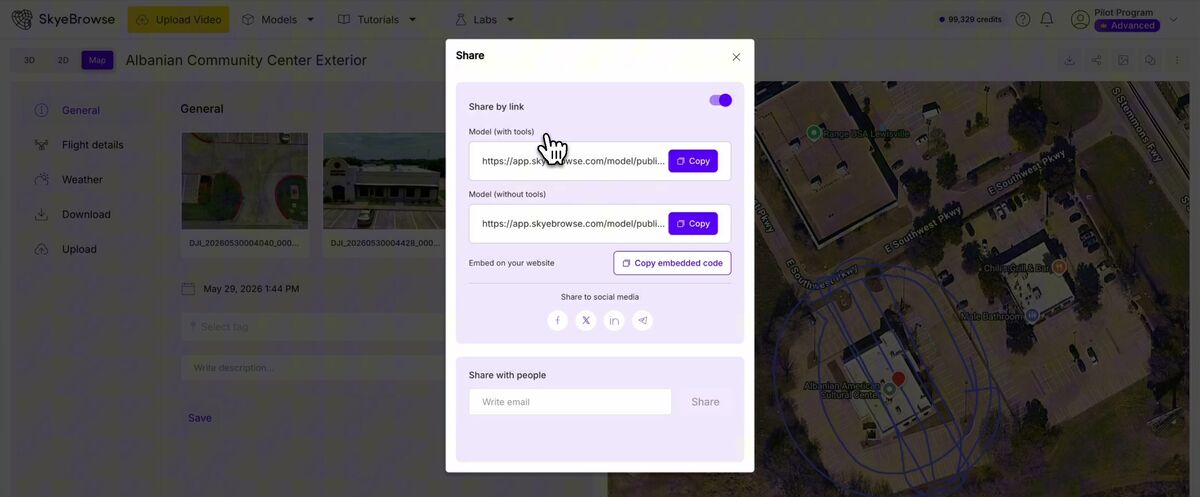
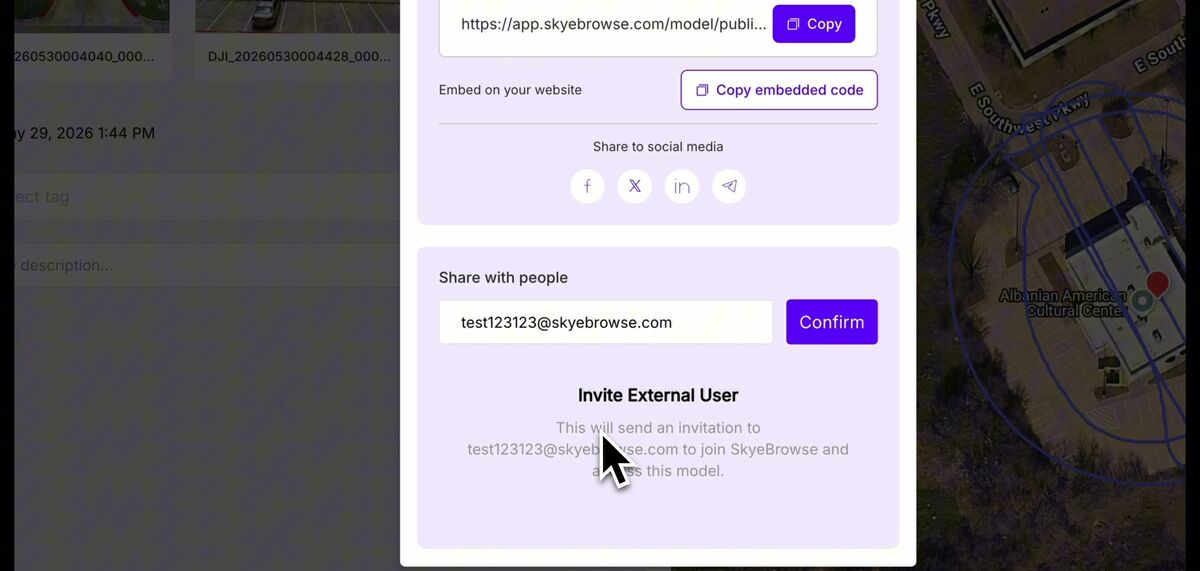
Models are private by default. The share menu offers a public link either with tools (recipients can measure and export) or without tools (view-only), plus an embed code for dropping the model into a website. Share with people sends the model to specific email addresses instead of a public link, with existing SkyeBrowse users notified by email and new recipients invited to a free account.
Models are private by default. The share menu toggles a public link with two flavors: share with tools, so recipients can measure and export, or share without tools for a clean, view-only model. An embed code drops the model into any website.
For secure sharing without a public link, share with people sends the model to specific email addresses. Existing SkyeBrowse users get an email notification, and recipients without an account get a free account invite that unlocks the shared model.
Rounding out the viewer: the 2D view tab holds the auto-generated sketch drawing and the GeoTIFF map, the map view replays your flight path and recorded videos, flight details show capture parameters and weather when the model was flown with the SkyeBrowse Flight App, and comments support collaboration on the model itself. Under the Labs menu, experimental tools like the crowd counter (upload an image, get a people count in seconds) are free for anyone to try.
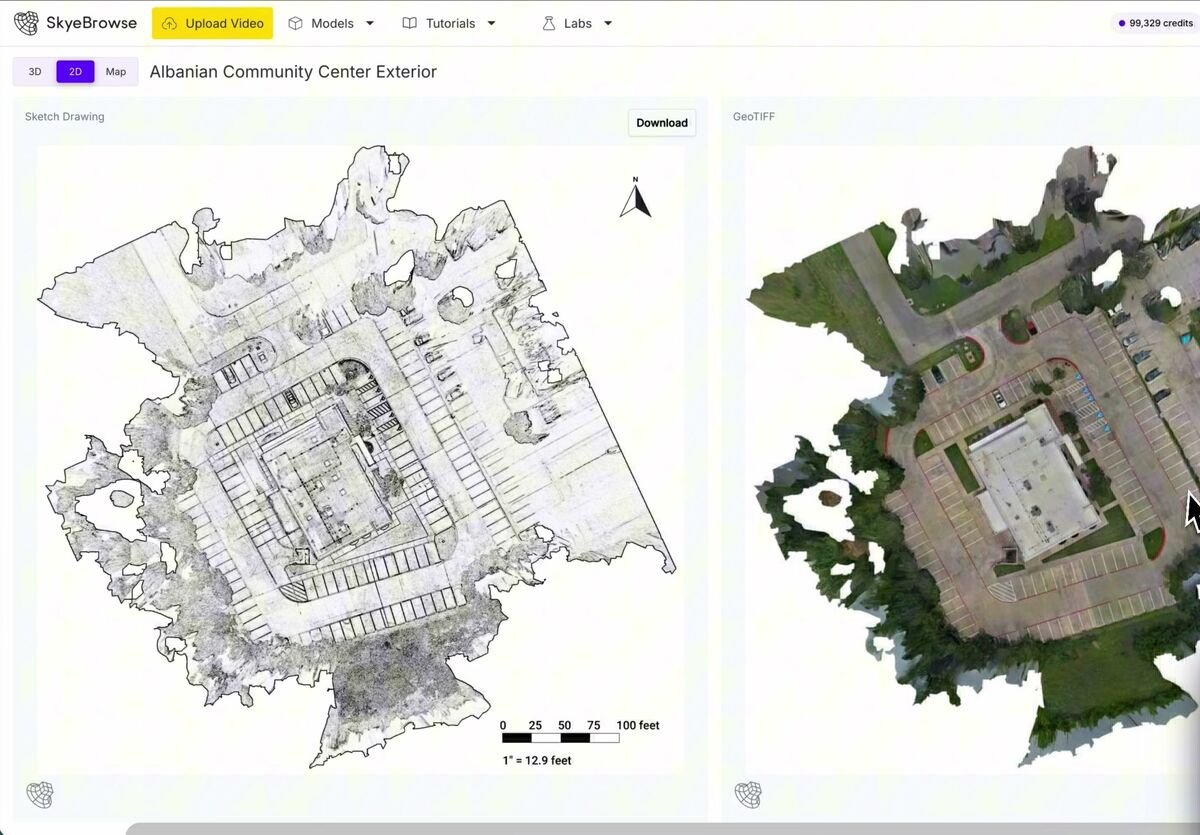
2D view with the auto generated sketch drawing and GeoTIFF
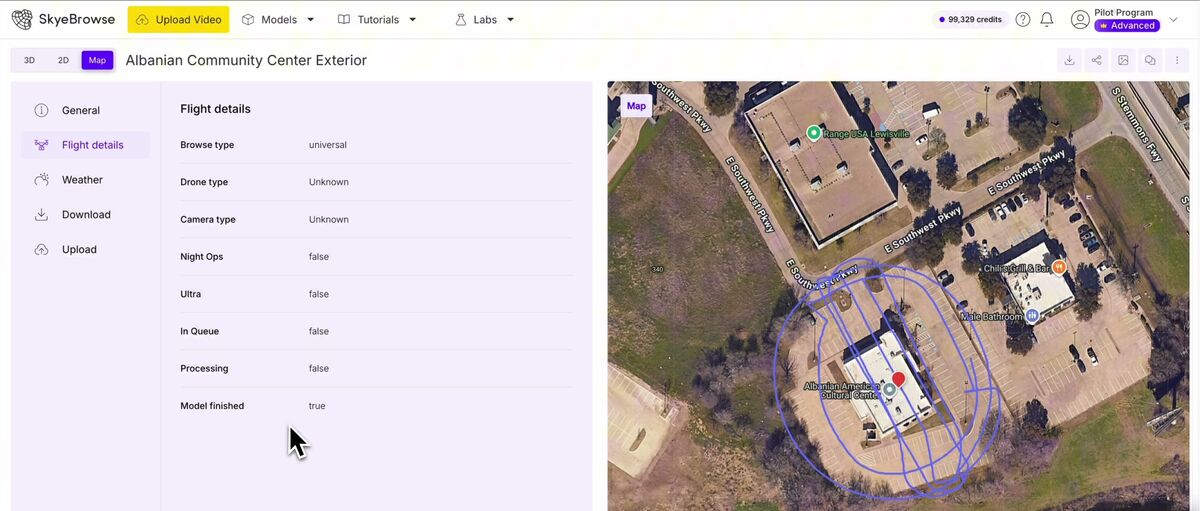
Flight details and the recorded flight path
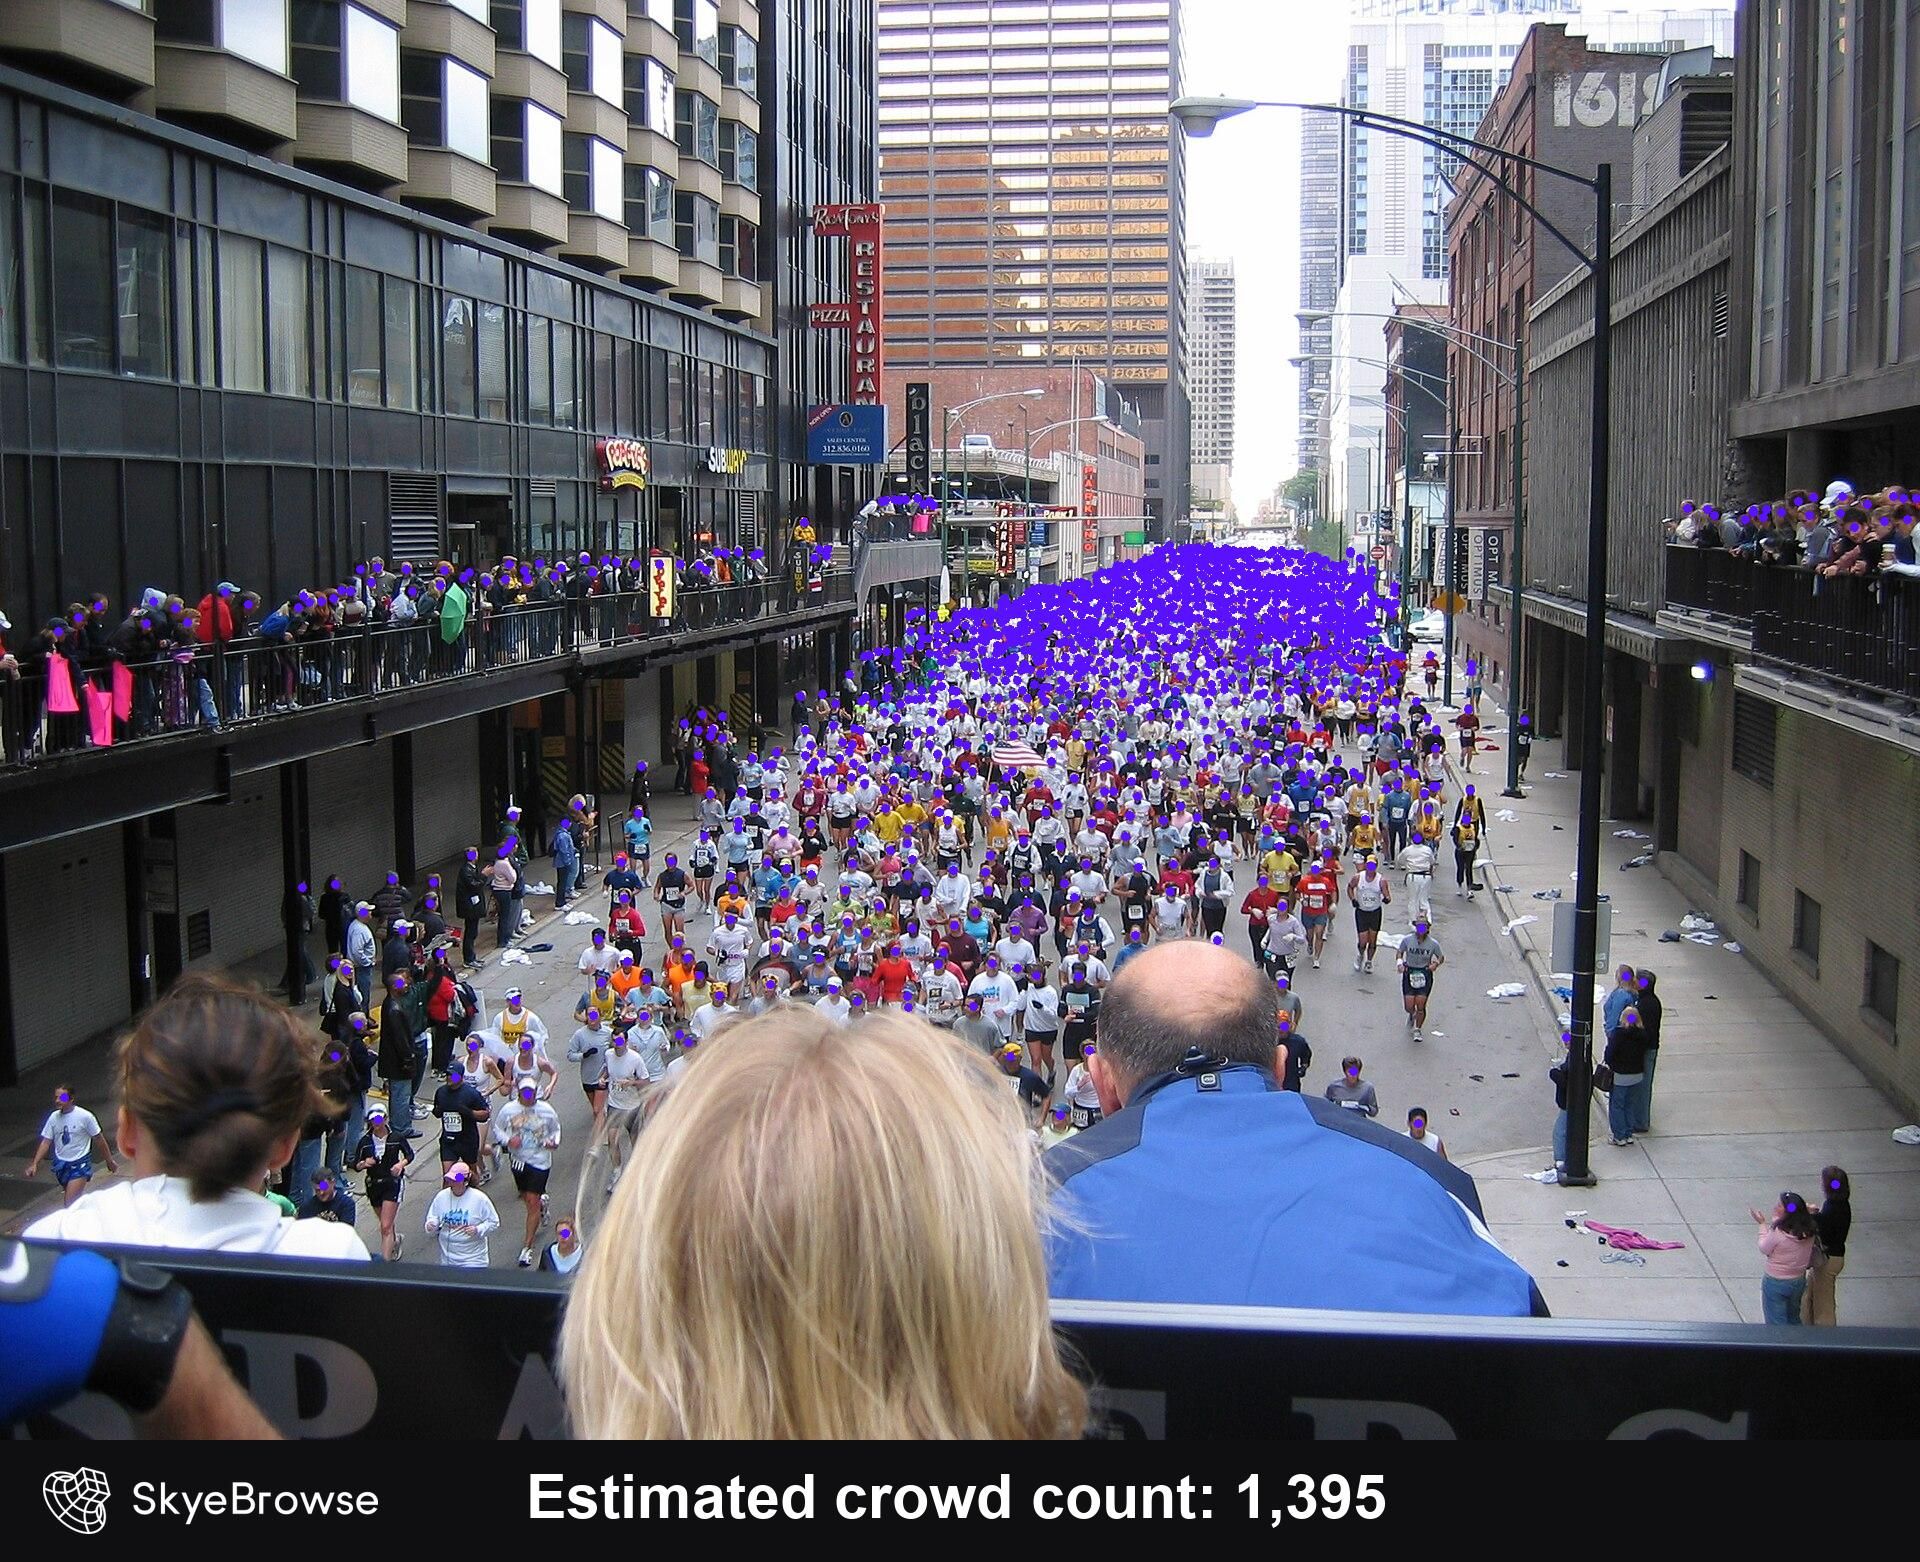
Crowd counter estimating crowd size from an image
Frequently Asked Questions
Do I need to install software to use the SkyeBrowse 3D viewer?
No. The viewer runs entirely in a web browser at app.skyebrowse.com. Every tool in this tutorial, from volume measurements to CAD exports, works without a desktop install.
How accurate are measurements in the SkyeBrowse viewer?
Models uploaded with GPS logs (SRT subtitle files or Flight App missions) are georeferenced automatically, so measurements are accurate out of the box. Slope map cross-sections read to a tenth of an inch, and the volume tool calculates stockpile and earthwork quantities directly from the model. Models without GPS logs need one pass with the scale tool against a known distance.
Can other people view my 3D model without a SkyeBrowse account?
Yes. A public share link opens the model for anyone, with or without tools depending on the option you choose, and the embed code puts the model directly on your website. Secure sharing with specific people invites non-users to create a free account first.
What file formats can I export from the 3D viewer?
Screenshots and sketch drawings export as images, site plans and wall elevations export as images or DXF files compatible with CAD software, flythrough videos export in HD or 4K, factual diagrams export as multi-page PDFs, and the 2D tab provides a GeoTIFF.
What is the difference between the Measure and Create tabs?
Measure tools analyze the scene: distance, area, volume, angle, slope, annotations, line of sight, and the view tools. Create tools produce deliverables that leave SkyeBrowse: screenshots, sketches, floor plans, CAD site plans, videos, and factual diagram PDFs.
Conclusion
The SkyeBrowse 3D model viewer packs measurement, analysis, and export tooling into a browser tab. Fly the scene, open the model, and everything from a distance measurement to a court-ready factual diagram is a few clicks away. If you have not made your first model yet, start with the Universal Upload tutorial for manual flights on any drone, or the Flight App tutorial for one-button automated missions on DJI and Autel drones.
If you haven't already, you can make a free account with SkyeBrowse and create your first 3D model today!
Upload your first video free. Create a free SkyeBrowse account, upload a drone video, and get a 3D model processed in the cloud. Freemium organizations that have never had a paid plan can get their first full Commercial model for $5 (normally $24.99), with every Pro tool and export included and 90-day storage.